Video Walkthrough
Please follow along with the video walkthrough below, demonstrating how you can send emails from another account – an account different from the account authorized to submit emails to Microsoft Graph.
Sending email from another account – for example a Shared Mailbox – is a premium use case that requires the WPO365 | MAIL plugin to be installed and activated. Note that the premium email features are also unlocked by any of the popular premium tiers.
Installing the Premium Mail Plugin
- Purchase and download the WPO365 | MAIL plugin.
- Go to Plugins → Add New → Upload Plugin in WordPress.
- Upload and install the plugin.
- Verify that WPO365 Mail (premium extension) appears in the plugins list.

This extension enhances the Microsoft Graph mail functionality of the core WPO365 plugin and expects that either the WPO365 | MICROSOFT GRAPH MAILER or the WPO365 | LOGIN plugin is also installed and active.
Exploring New Mail Configuration Options
- Open the WPO365 > Mail configuration page.
- Confirm that additional premium configuration options are now unlocked and available.
Configuring to send from an alias email address
Please note that this step is not shown in the walkthrough video as this feature has been added after the video was recorded.
- Enable the option Send from an alias.
- Enter the alias email address, e.g. [email protected].
- Confirm that the alias address exists:
- Open Microsoft 365 Admin Center.
- Navigate to Users > Active Users and click to view the authorized user’s details.
- On the user’s details panel, select the Account tab and click Manage username and email.
- Ensure that the alias email address exists as an alias of the user that you authorized to submit emails to Microsoft Graph.
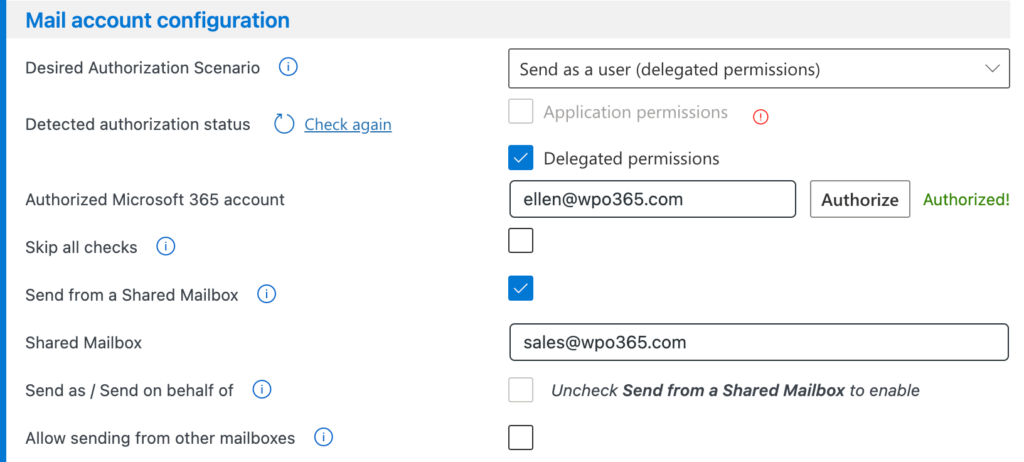
Configuring a Shared Mailbox as the Sender
- Enable the option Send from a Shared Mailbox.
- Enter the shared mailbox email address, e.g. [email protected].
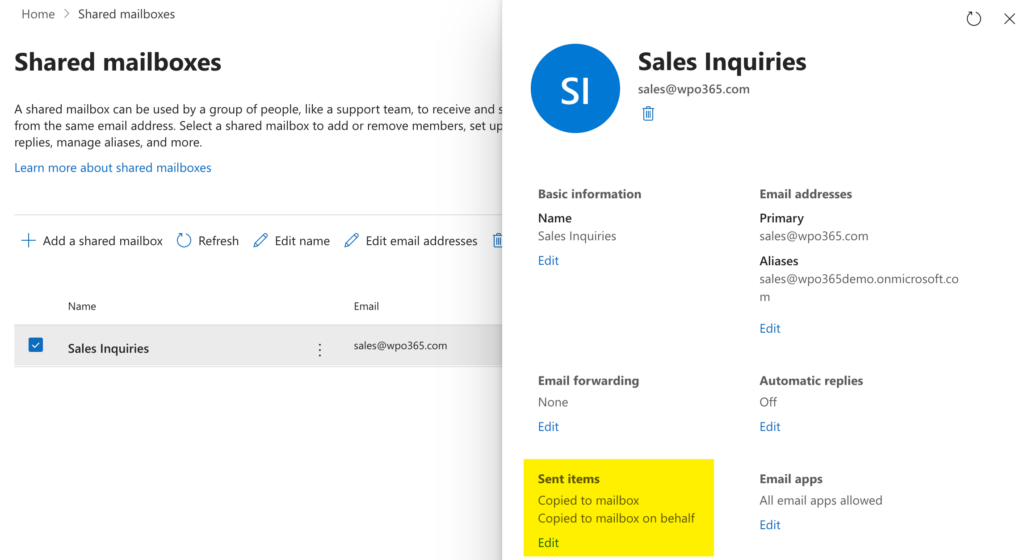
- Confirm the Shared Mailbox configuration in Microsoft 365:
- Open Microsoft 365 Admin Center.
- Navigate to Teams & Groups > Shared Mailboxes.
- Verify that the shared mailbox exists.
- Ensure that the user that you authorized to submit emails to Microsoft Graph is a member of the shared mailbox.
This is important because WordPress emails are sent via Microsoft Graph using delegated permissions. Only the authorized user can submit emails, and that user must have permission to send on behalf of the Shared Mailbox i.e. must be a member of the Shared Mailbox.
Also note that, if you want messages sent by the authorized account to appear in the Shared Mailbox’s Sent Items folder, you must update the Shared Mailbox configuration as outlined below.
Saving and Testing the configuration
- Scroll down and click Save configuration + Send test email.
- Notice that an error appears when you didn’t enter the email address of a test recipient. This is expected, because saving the configuration will always attempts to send a test email.
- Enter a test recipient, e.g. [email protected].
Verifying Delivery
- Confirm that the email submission to Microsoft Graph was successful.
- Switch to the recipient’s mailbox – for example using Outlook on the Web (outlook.office.com).
- Verify that the email was received and was indeed send from the Shared Mailbox.
Allowing Applications to Override the “From” Address
- Return to the WPO365 > Mail configuration page.
- Uncheck the option Send from a shared mailbox. Now emails will again appear to the recipient as sent from the email address belonging to the authorized user account.
- Enable Allow sending from all mailboxes. This allows plugins – for example a Contact Forms plugin – to define a “From” email address that then overrides the default “From” i.e. the email address of the authorized account.
- Scroll down and click Save configuration + Send test email.
- Notice that an error appears when you didn’t enter the email address of a test recipient. This is expected, because saving the configuration will always attempts to send a test email.
Please note that the “From” address specified by the form must still be a mailbox for which the authorized user has permission to send as or on behalf of.
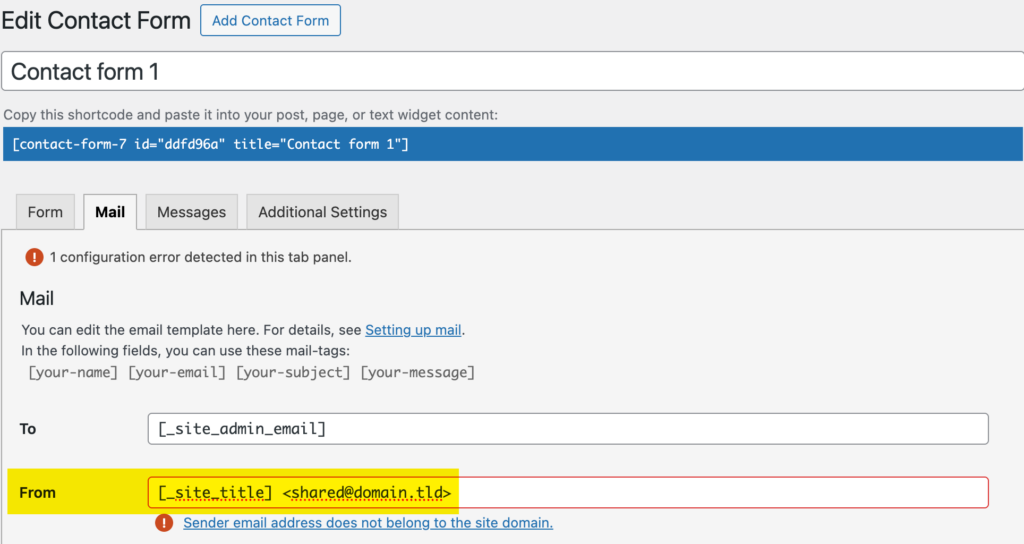
Example: Contact Form 7 with a Custom “From” Address
- Install and activate Contact Form 7.
- Go to WP Admin > Contact > Default Contact Form.
- Open the Mail tab.
- Set the From address to – for example – a Shared Mailbox e.g. [email protected]
- Configure the form to:
- Send the main email from [email protected].
- Send a copy to the user’s email address using [your-email] using the Mail2 option.
- Save the form configuration.
Publishing the Contact Form
- Copy the Contact Form shortcode.
- Create a new post or page.
- Paste the shortcode into the page.
- Open the page and view the contact form.
Submitting and Verifying the Form
- Fill out the form:
- Name: First Lastname
- Email: [email protected]
- Message: “This is a test message”
- Submit the form.
- Confirm the successful submission message.
- Open the recipient’s mailbox.
- Verify receipt of the email and ensure that the sender appears as [email protected].