Video Walkthrough
Please follow along with the video walkthrough below, explaining the steps required to register your WordPress website in Entra ID when planning to send WordPress emails from any Microsoft 365 (Shared) Mailbox using Microsoft Graph.
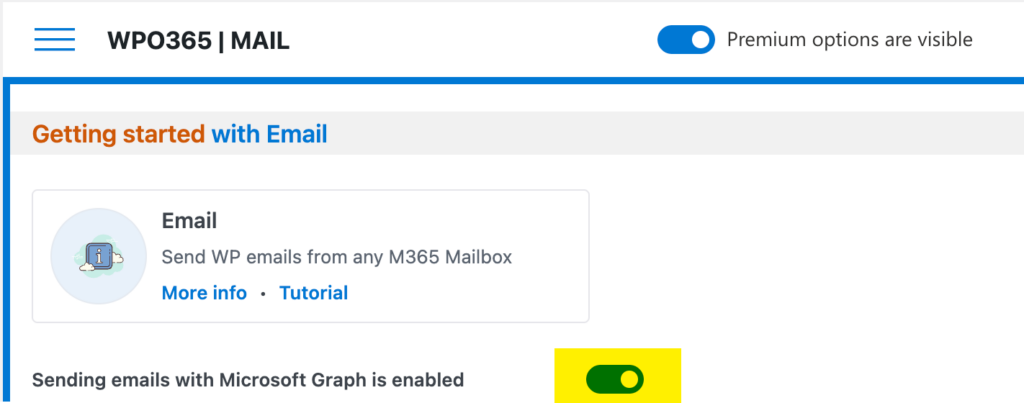
Prepare Email Sending with Microsoft Graph
- Navigate to the plugin’s Mail configuration page.
- Review the documentation links at the top of the page for additional guidance.
- Locate the option to enable Microsoft Graph mail.
- Enable this option to allow WordPress to send emails via Microsoft Graph.
- Understand that email sending will fail until configuration is completed.
- Perform this step during a time when your website has low or no traffic.
Register Your WordPress Site in Microsoft Entra ID
- Go to https://entra.microsoft.com.
- Open your Entra ID tenant.
- Navigate to App registrations.
- Click New registration.
- Enter a descriptive name.
- Select Single tenant as the supported account type.
- Return to your WordPress plugin configuration page.
- Locate the Redirect URI suggested by the plugin and copy that value.
- In Entra ID, select Web as platform type.
- Paste the Redirect URI into the field.
- Click Register.
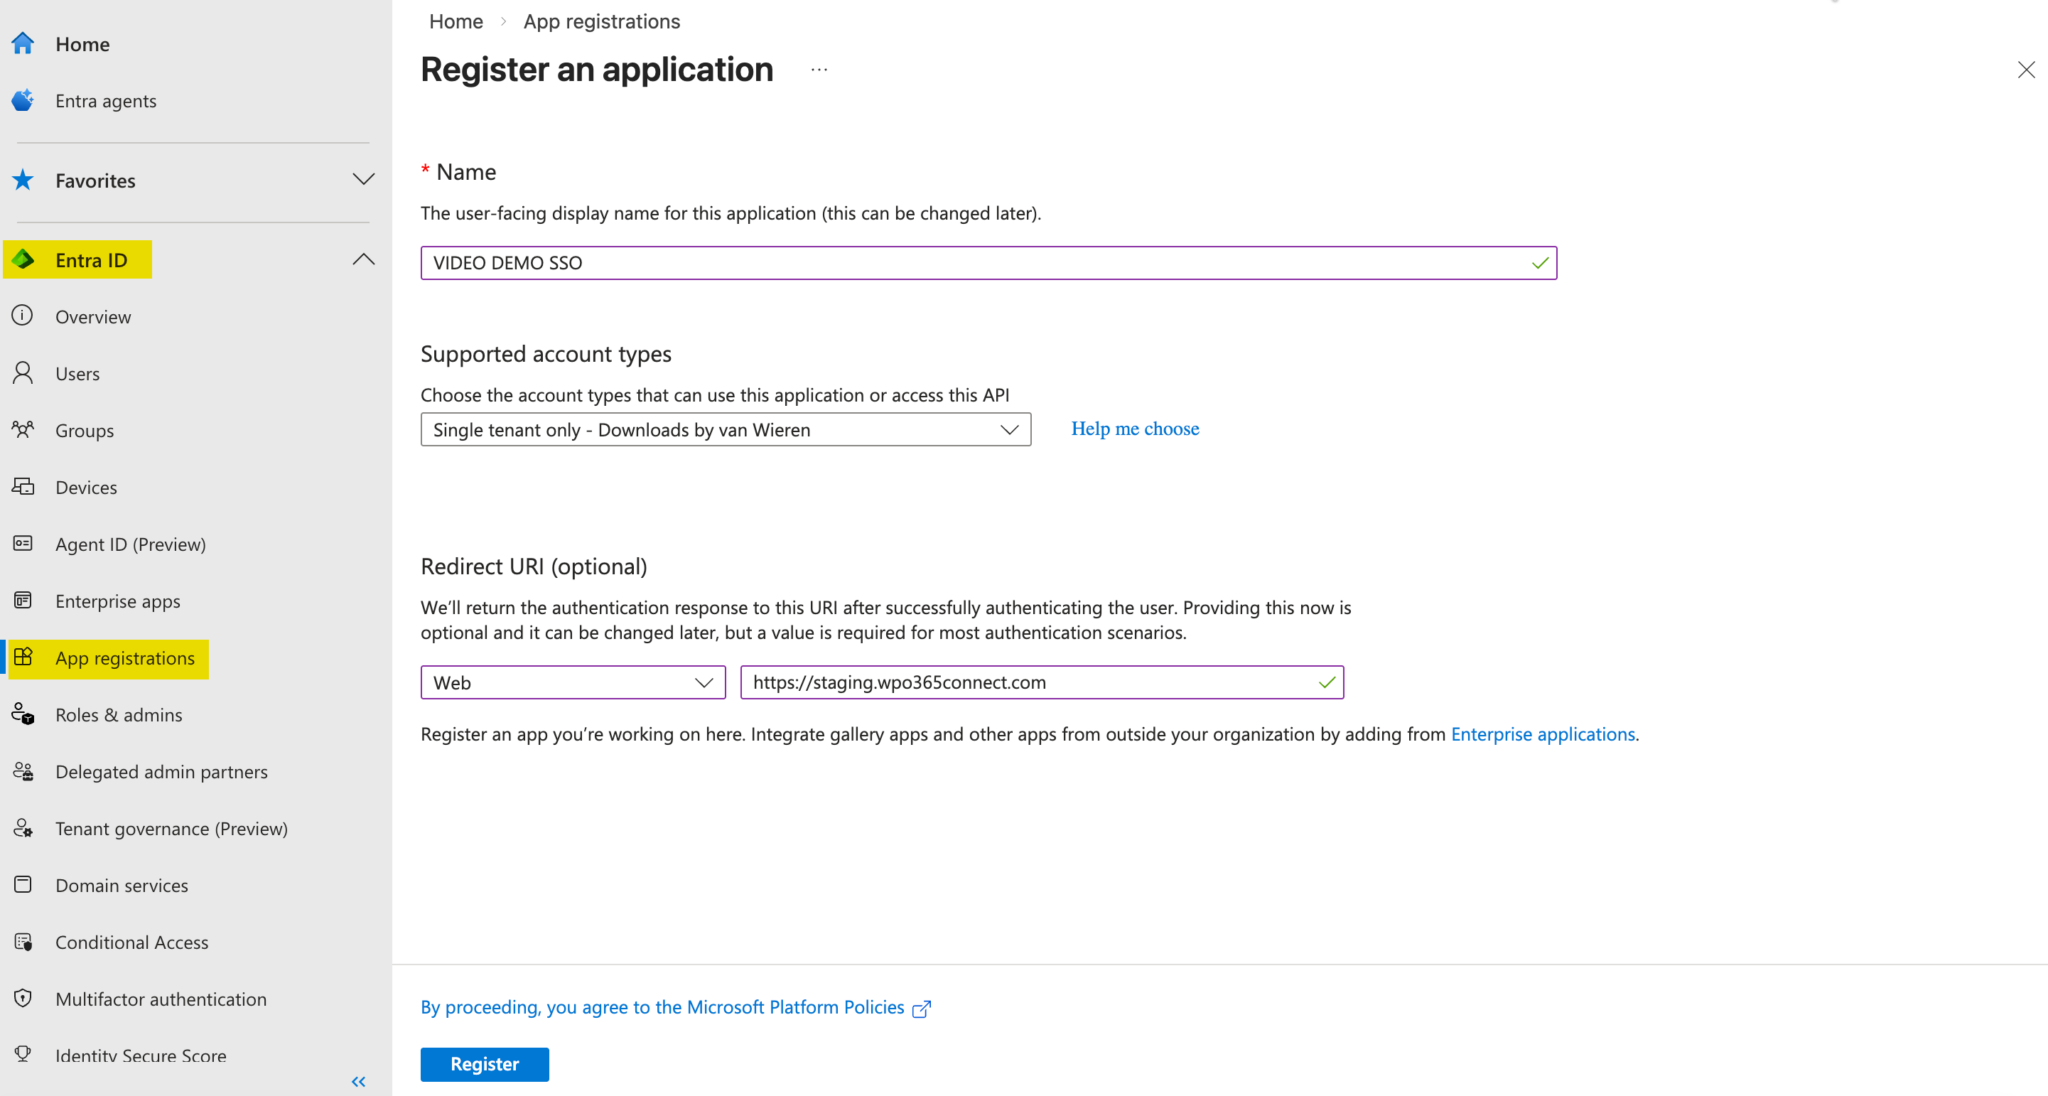

Please note The website address https://staging.wpo365connect.com/ is used as an example here and is the address of the website used in this video. You will configure your own website and therefore you should not use https://staging.wpo365connect.com.
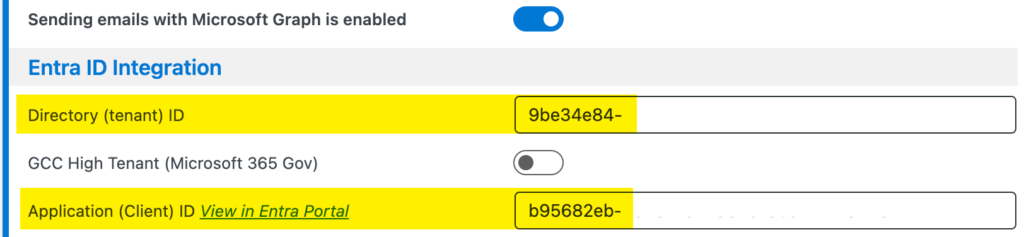
Copying required IDs to the WPO365 plugin configuration
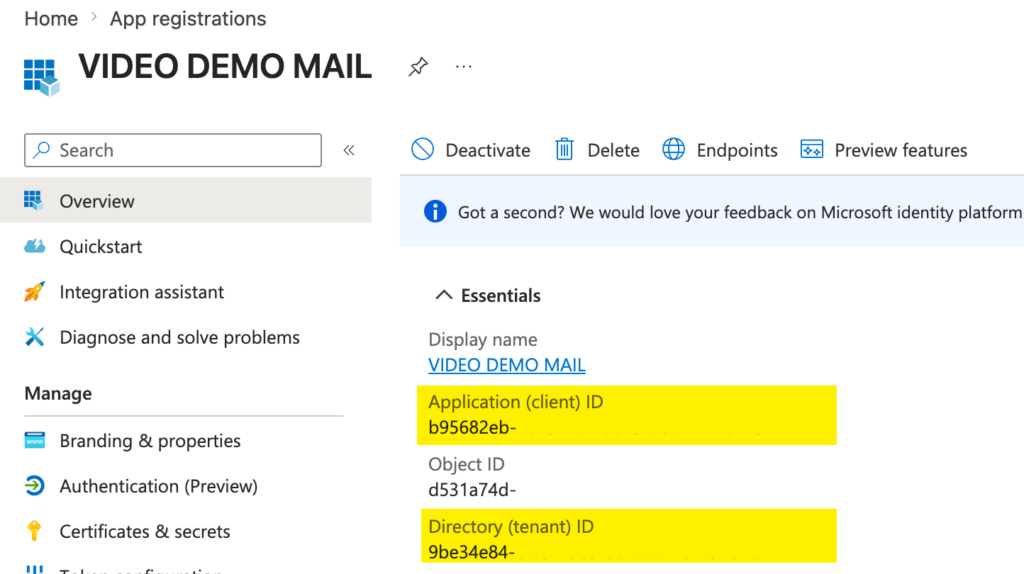
- After registration, copy the Application (client) ID from the overview page.
- Paste it into the corresponding field in the plugin configuration.
- Copy the Directory (tenant) ID from the same page.
- Paste it into the plugin configuration.