
Video Walkthrough
Please follow along with the video walkthrough below, demonstrating how you should configure API Permissions, when planning to send WordPress emails from any Microsoft 365 (Shared) Mailbox using Microsoft Graph.
Assign Microsoft Graph API Permissions
- The application still requires additional API permissions. Therefore return to the Microsoft Entra portal. If you previously closed the browser tab for your app registration, click the View in Entra portal next to the Application Client ID on the plugin’s Mail configuration page to reopen it and continue.
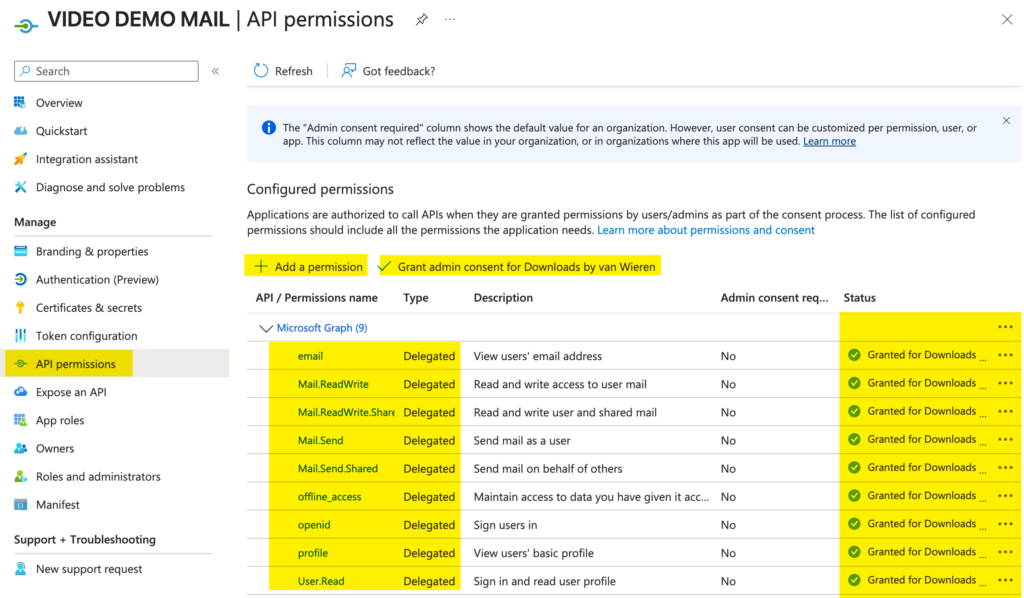
- Open the API permissions page in the Microsoft Entra App Registration.
- On this page, you will see that some permissions are already present:
- User.Read for basic sign-in permissions.
- Default OpenID permissions.
- Click Add a permission to add the required permissions.
- Choose Microsoft Graph.
- Select Delegated permissions.
- Under OpenID permissions:
- Select all available options including offline_access.

The plugin requests these OpenID permissions to retrieve an ID token when authorizing a user account. This token is used to validate the email address of the configured default user account.
If you choose to skip this validation step – by checking Skip all checks – or if you intend to send emails using application permissions – instead of delegated permissions – you do not need to grant these OpenID permissions.
Permissions for “Send as a User” scenario
- Click Add a permission to add the required permissions.
- Choose Microsoft Graph.
- Select Delegated permissions.
- To enable email sending, additional permissions are required:
- Scroll to the Mail section.
- Select Mail.Send to allow the application to send email as the signed-in user.
- Optional permissions depending on your use case and require the premium WPO365 | MAIL plugin:
- If you want to send emails from a Shared Mailbox, also select:
- Mail.Send.Shared
- If you need to send attachments larger than 3 MB, select:
- Mail.ReadWrite
- If you are sending emails from a shared mailbox with large attachments, additionally select:
- Mail.ReadWrite.Shared
- If you want to send emails from a Shared Mailbox, also select:
- These are the permissions required for the supported mail‑sending scenarios.
Permissions for “Send as any User” scenario
- Click Add a permission to add the required permissions.
- Choose Microsoft Graph.
- Select Application permissions.
- Now add the following permission.
- Scroll to the Mail section.
- Select Mail.Send to allow the application.
- Optional permissions depending on your use case and require the premium WPO365 | MAIL plugin.
- If you need to send attachments larger than 3 MB proceed as follows.
- Add Mail.ReadWrite
- If you need to send attachments larger than 3 MB proceed as follows.
Permissions for “Send as any User (RBAC for EXO)” scenario
For this scenario, no further permissions need to be added in Entra ID. Even though the plugin calls Microsoft Graph (for example, using /sendMail), the actual permission check is performed by Exchange Online.
Grant admin consent
- After adding the permissions, click Grant admin consent and confirm.
If the Grand admin consent for … is greyed out then you do not have sufficient permissions to continue. Since this is mandatory you must contact your Global Administrator and ask for help.
The WordPress website is now fully registered and authorized in your Microsoft Entra ID tenant and you can now return to the plugin’s Mail configuration page in WordPress.