
Video Walkthrough
Please follow along with the video walkthrough below, demonstrating how you should configure ID token claims, when planning to send WordPress emails from any Microsoft 365 (Shared) Mailbox using Microsoft Graph.
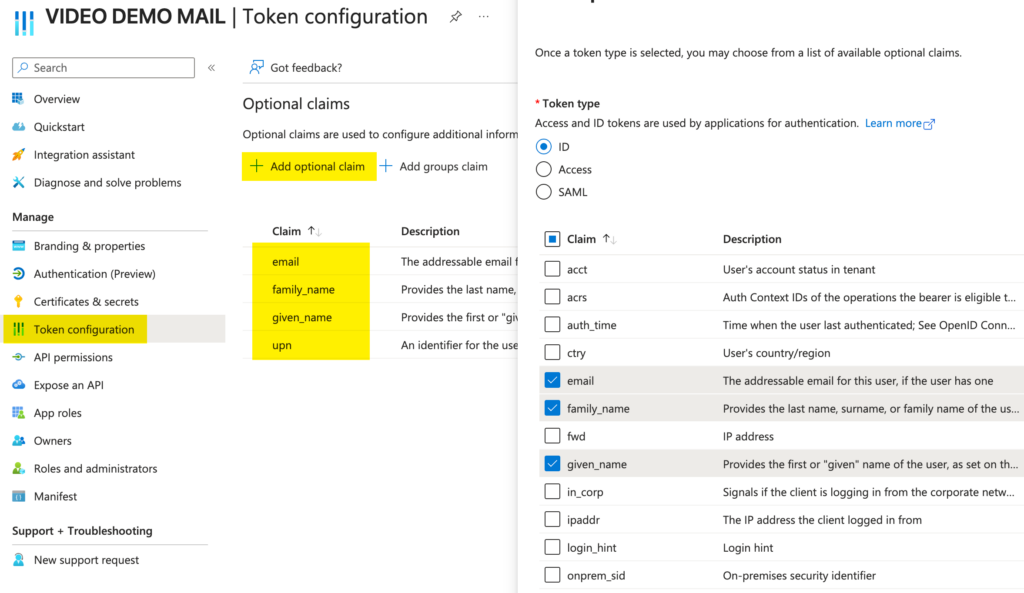
Configure ID Token Claims in Microsoft Entra ID
When WPO365 will try to authorize a specific account to submit email messages to Microsoft Graph, it will also request an ID token to verify the email address of that account.

Please note This step is optional and can be skipped if you will check the option to Skip all checks on the plugin’s Mail configuration page.
- Return to the Microsoft Entra portal. If you previously closed the browser tab for your app registration, click the View in Entra portal next to the Application Client ID on the plugin’s Mail configuration page to reopen it and continue.
- Open Token configuration to add optional claims to the ID token.
- Select the following optional claims to the ID token then click Add:
- family_name
- given_name
- upn
- When prompted to enable additional permissions:
- Confirm the prompt and select Yes to enable them.
- These permissions are required to include the selected claims in the token.
- With the optional claims added, the Token configuration is completed.
If you are asked to add the email and profile permissions required for these fields to be sent in the ID Token, then confirm by clicking yes.