Mapping between Azure AD and WordPress users
Whenever an Azure AD user signs into WordPress, the plugin will retrieve an ID Token. It will use the information in the ID Token to find a WordPress user with a matching Azure AD Object ID (1st attempt) or with a matching preferred username (2nd attempt) or with a matching email address (3rd attempt). If no user is found, it will create a new WordPress user with the same username as the Azure AD / Microsoft 365 username.

Please note The free plugin WPO365 | LOGIN will only create a user but not populate that user’s email address, first. last and display name. If you need these fields to be filled out automatically, then please have a look at the available premium extensions and bundles.
Also note Premium versions – for example the LOGIN+ addon – will allow you to control the username that WPO365 will configure for a new user.
Perform the following steps to disable the automatic creation of new users.
- Go to WP Admin > WPO365 > User registration.
- Uncheck the option Create new users.
- Scroll to the bottom of the page and click to Save configuration.
If you want to manually create a WordPress (test) user to match with a user that signs in with Microsoft then configure that user so that:
- The WordPress user’s username matches that user’s Azure AD / Office 365 username e.g. ‘[email protected]’ or ‘[email protected]’.
- And / or the WordPress user’s email address matches your user’s Azure AD / Office 365 email e.g. ‘[email protected]’ (note that often Office 365 / Azure AD login names and their email addresses are the same).
You receive “AADSTS700025: Client is public so neither ‘client_assertion’ nor ‘client_secret’ should be presented”
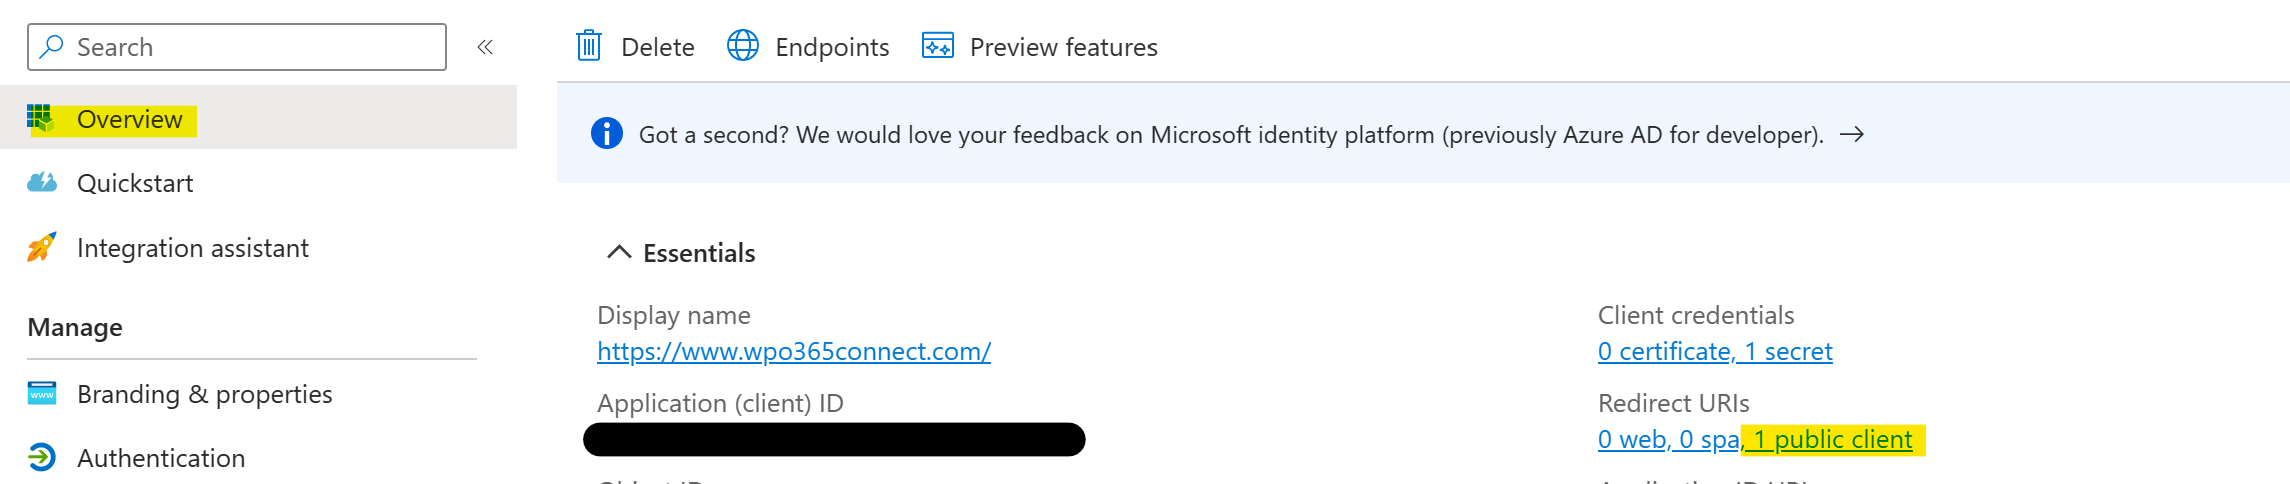
You will see this error if you configured your App registration in Azure AD to support a public client application such as a mobile or desktop application. Navigate to the plugin’s Single Sign-on configuration page, scroll down to the setting for the Application (client) ID and click the View in Azure Portal link. This will take you to the application that you registered in Azure AD for your WordPress website. Here you can check on the application’s Overview page whether you have – by accident – configured a public application instead of a confidential client (this Microsoft article does provide some additional background information).
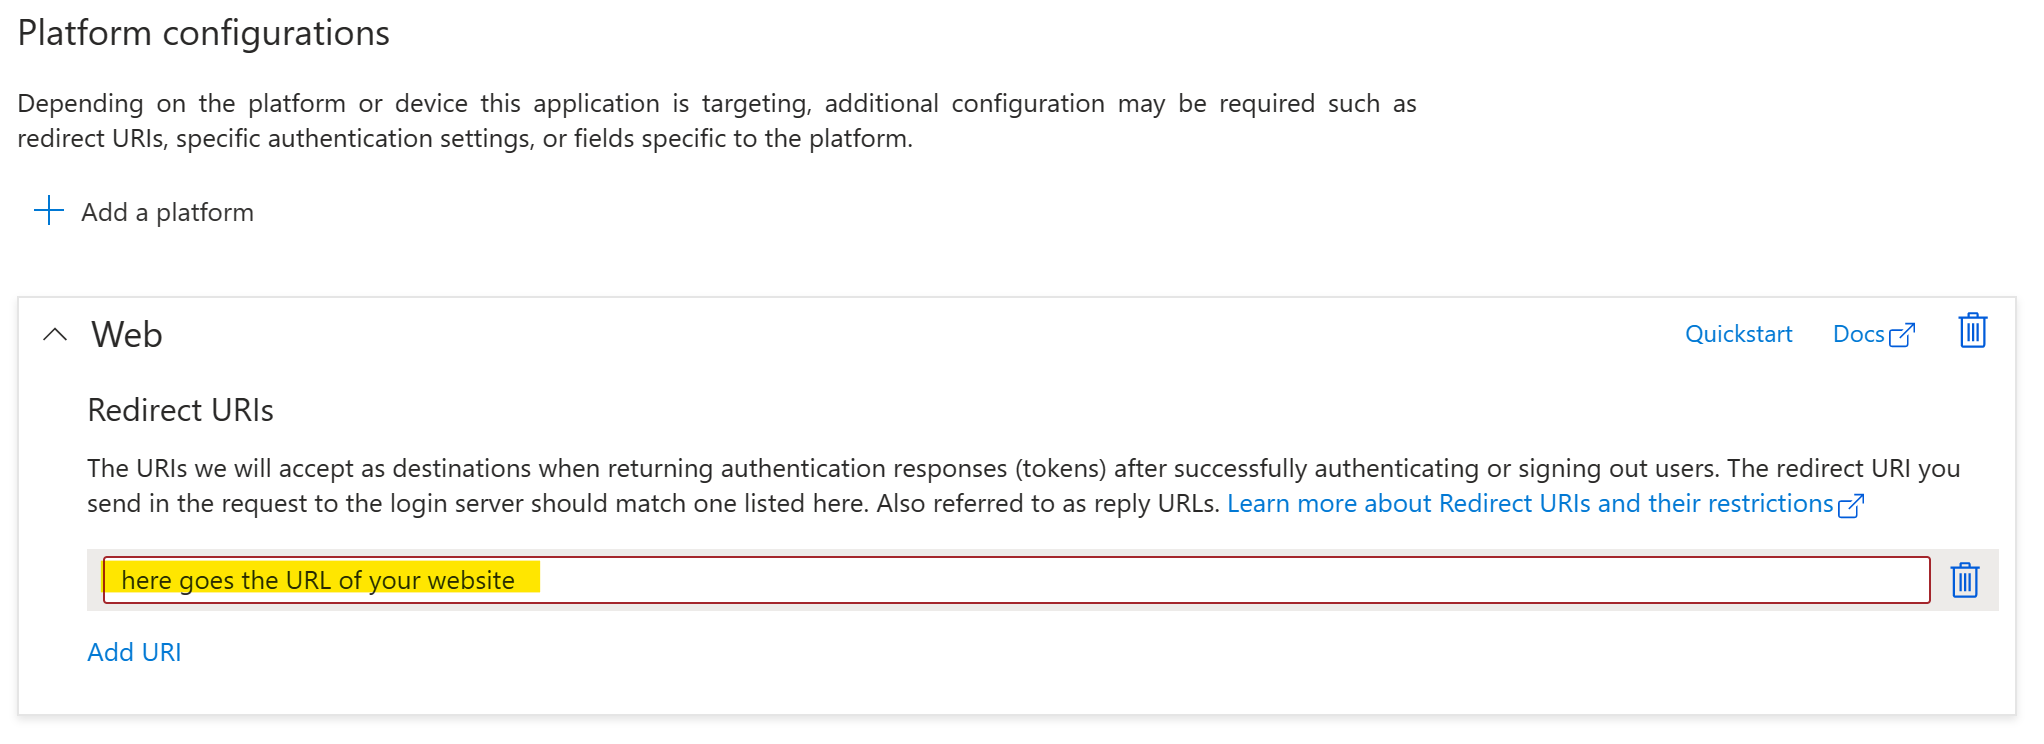
To correct this, please go the App registration‘s Authentication page, remove all platforms and click + Add platform and make sure to add a new Web application.
 Now add your website’s homepage URL as Redirect URI and make sure that the URL that you enter here is exactly the same as the URL entered as Redirect URI on the plugin’s Single Sign-on page, or else Microsoft will refuse to authenticate a user and show an error instead.