
Video Walkthrough
Please follow along with the video walkthrough below, demonstrating how you can register your WordPress website in Entra ID and copying the required IDs to the WPO365 plugin configuration, when adding Microsoft (Entra ID) login to WordPress using the OpenID Connect protocol.
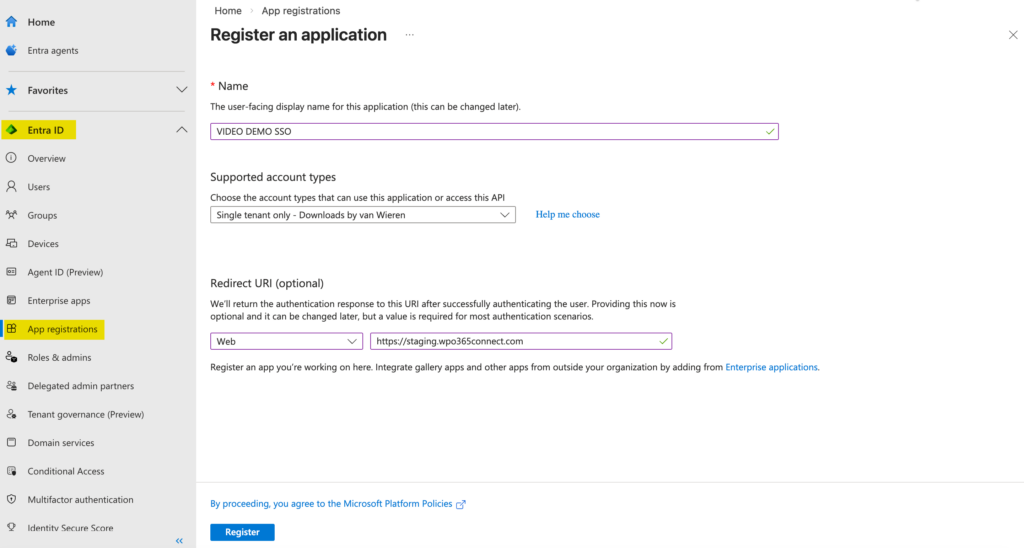
Registering the WordPress Site as an Application in Microsoft Entra ID
- Open a new browser tab and sign in to the Microsoft Entra portal.
- Navigate to Entra ID → App registrations.
- Click New registration to register a new application.
- Enter a name for the application (for example, the name of your WordPress site).
- Under Supported account types, select:
- Accounts in this organizational directory only (Single tenant).
- Configure the Redirect URI:
- Open the WPO365 Single Sign-on configuration page in WordPress.
- Copy the Redirect URI shown there (typically the site’s main URL).
- Paste this exact URL into the Redirect URI field in Entra ID.
- Click Register to create the application.

Please have a look at this article if your want to allow accounts in any (instead of in this) Azure AD tenant to sign into your WordPress website.
Copying required IDs to the WPO365 plugin configuration
- After registration, remain on the registered application’s Overview page.
- Copy the Directory (Tenant) ID.
- Paste it into the Directory Tenant ID field on the WPO365 Single Sign-on configuration page.
- Copy the Application (Client) ID.
- Paste it into the corresponding Application Client ID field on the WPO365 Single Sign-on configuration page.
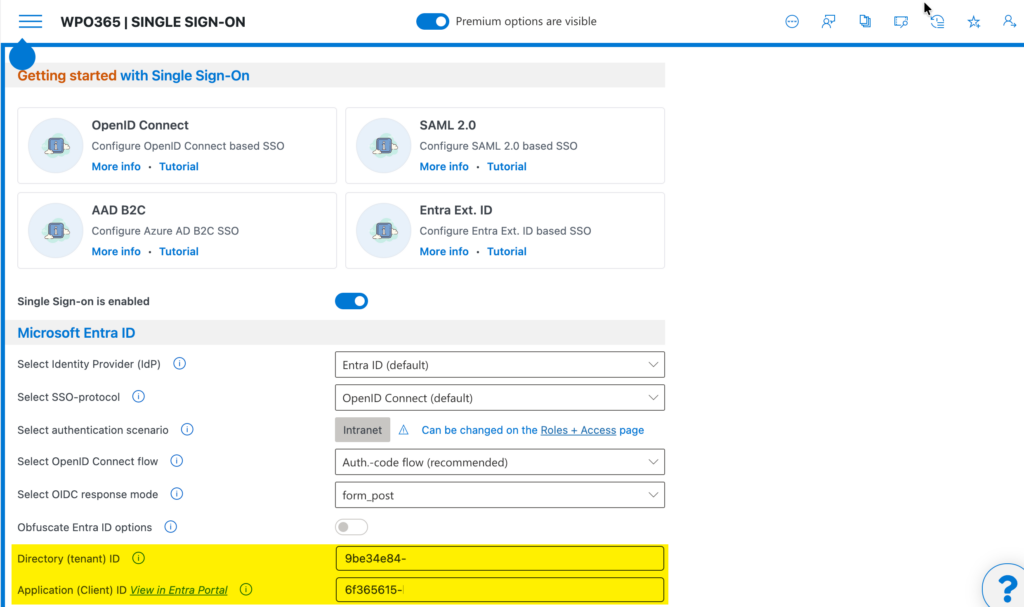
Note that a direct link View in Entra Portal is now available and clicking it will always take you back to the registered application in the Entra portal.