Video Walkthrough
Please follow along with the video walkthrough below, explaining the steps required for the installation and prerequisites when adding Microsoft (Entra ID) login to WordPress using the OpenID Connect protocol.
Prerequisites
- You are a Global Administrator for your company’s Microsoft 365 tenant / Entra ID directory (or have at least the ability to register new applications).
- You are an Administrator for your WordPress website.
- Your website uses SSL and the internet address starts with https://.

The only exception is when you host your (development) website on ‘localhost’. This restriction is enforced by Microsoft to protect oauth / ID tokens being exchanged between the Azure Active Directory endpoint and your website.
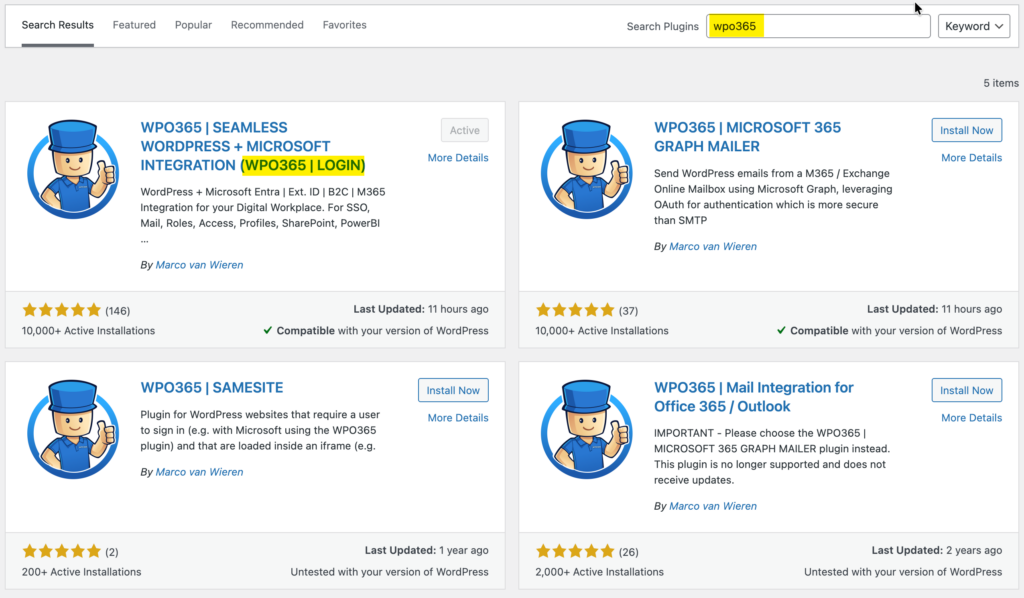
Installation
- In the WordPress admin dashboard, go to Plugins → Add New.
- Use the search field to look for WPO365.
- Locate the WPO365 | LOGIN plugin in the results.
- Click Install Now.
- Once installation completes, click Activate.
- After activation, open the plugin’s configuration page – for example by clicking the WPO365 link in the WordPress admin menu bar