
Perform the following steps to automatically configure the SAML Identity Provider portion of the Enterprise application.
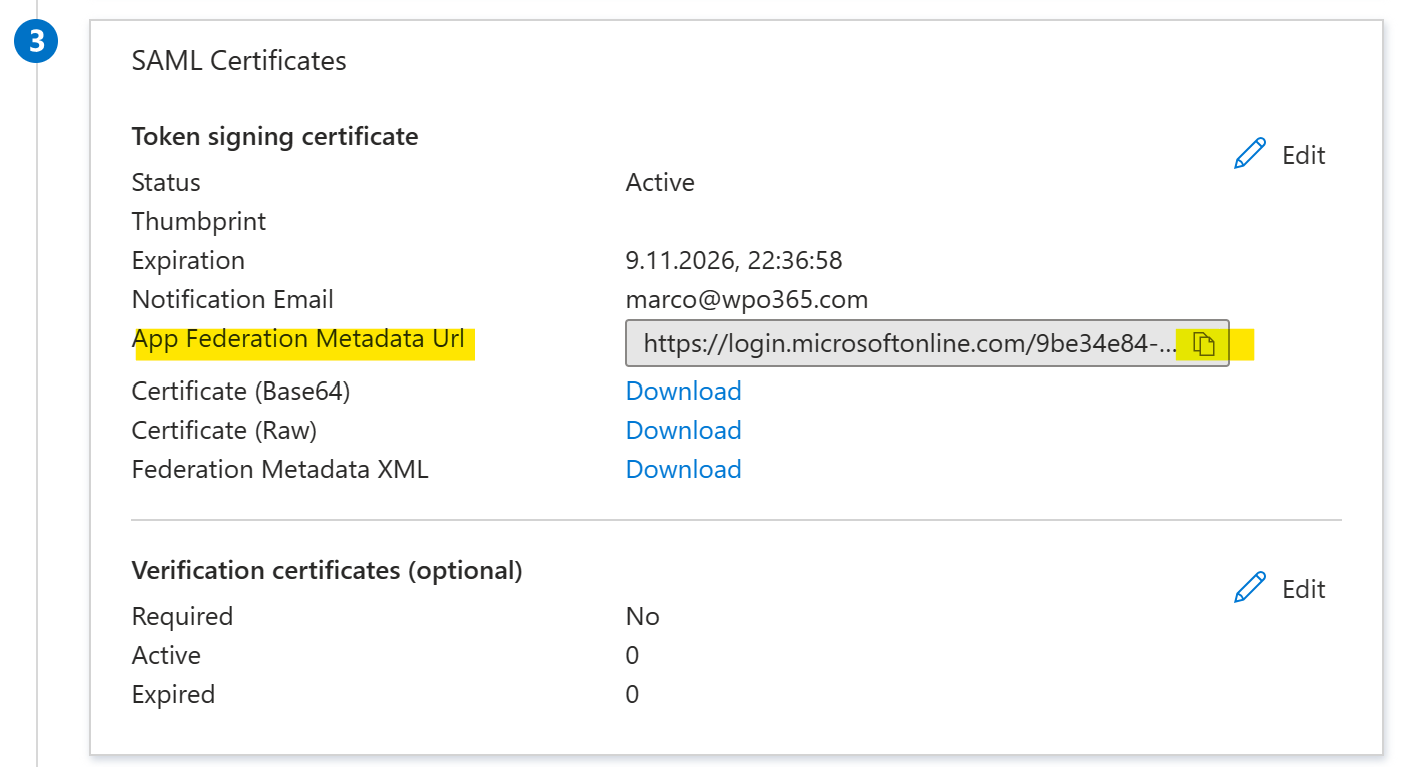
- Scroll down to the SAML Certificates section of the Enterprise application.
- Copy App Federation Metadata URL using the designated button.
- Switch to the tab with the plugin’s Single Sign-on configuration page still open.
- Scroll down to the section SAML 2.0 IdP Metadata and paste the App Federation Metadata URL in the corresponding field.
- Click Import.
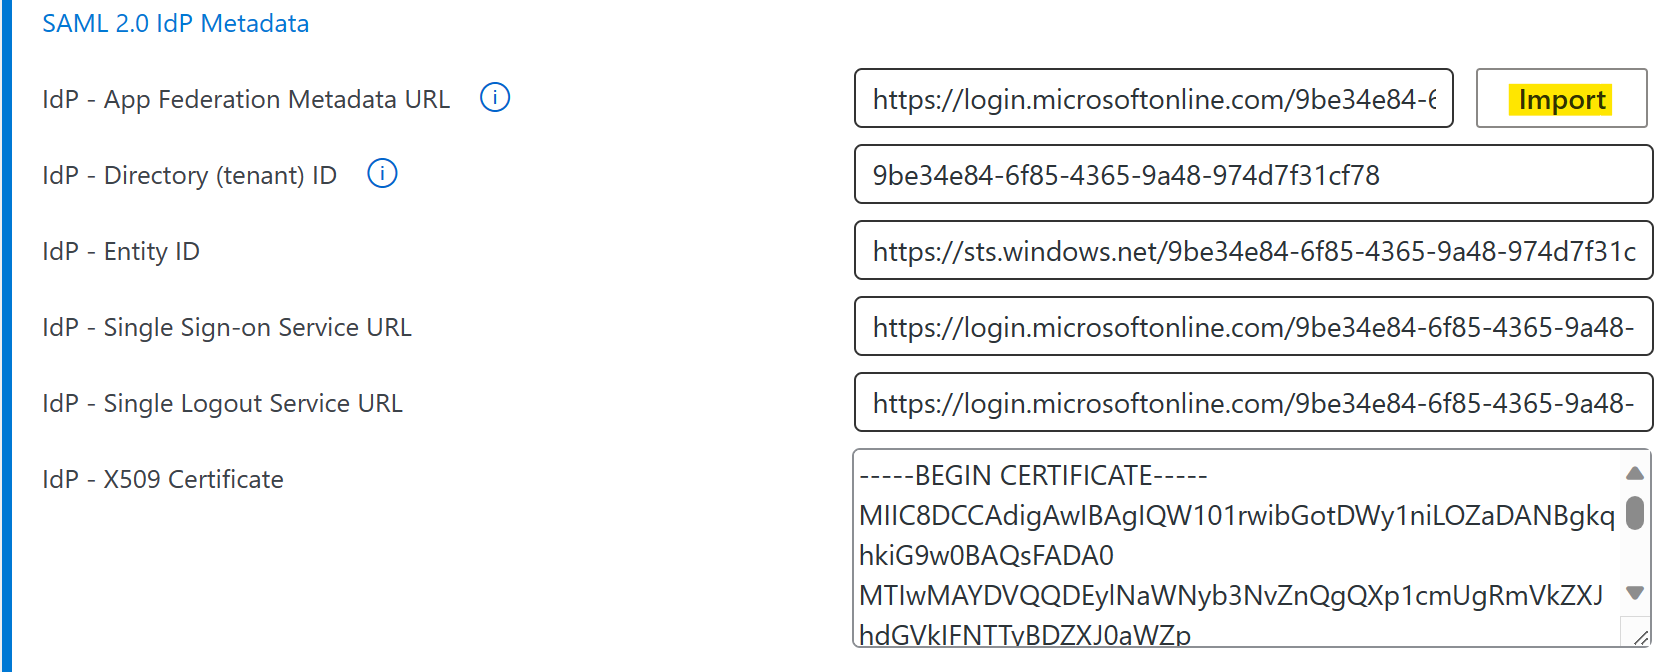
- Ensure that all fields in the section SAML 2.0 IdP Metadata are populated including the X509 certificate.
- Scroll down to the page and click Save configuration.