Create a new embed-app
Perform the following steps to embed an Outlook / Exchange calendar in WordPress for your organization.
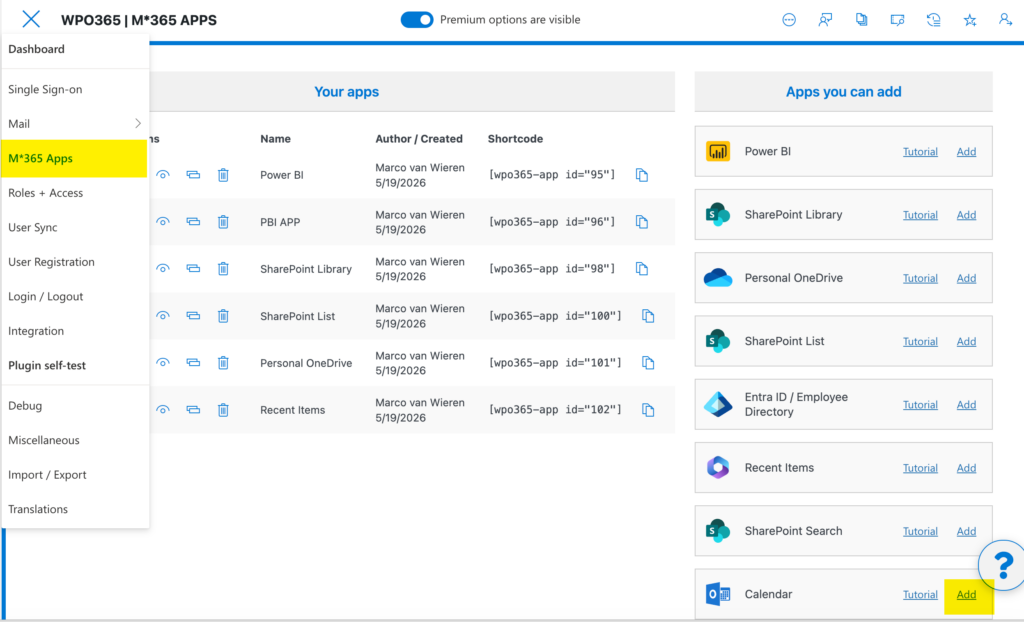
- Navigate to WP Admin > WPO365 > M*365 Apps.
- Locate the Calendar tile in the list of Apps you can add and click Add.
- A popup window will appear asking you to choose a scenario. Select For my organization.

Embedding for your organization means that users of the app must first sign in to your WordPress site using their Microsoft Entra ID work or school account. Once authenticated, the WPO365 plugin can request an access token on behalf of the user, allowing it to connect to Microsoft Graph and retrieve the required calendar data. The alternative For my customers would instead require so-called application-level permissions, allowing the plugin to authenticate independently and retrieve the required data without user involvement.
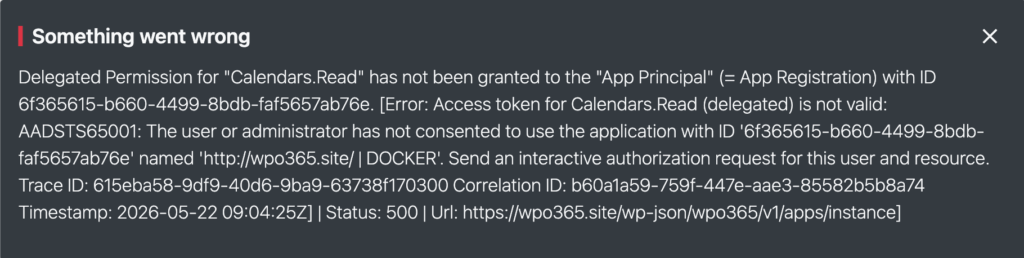
At this point you may see panel popping up, informing you that Something went wrong. Because as soon as you create a new embed-app for your organization, the plugin will check whether you – the current administrator creating the app – have delegated permissions to read user calendars.
Grant API Permissions to users to read events in user calendars
Perform the following steps to grant API Permissions for the registered application in Entra ID.
- Navigate to Entra Portal > Entra ID > App Registrations and locate the registered application for your WordPress website. Alternatively, you can go to the plugin’s Single Sign-on page, locate the Application (Client) ID setting and click the View in Entra Portal link.
- Select API Permissions.
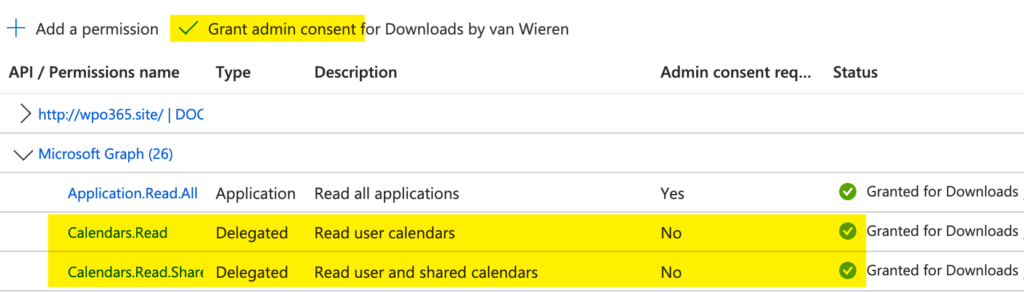
- Click + Add a permission.
- Select Microsoft Graph > Delegated permissions and look up Calendars.Read.
- Select Calendars.Read (and optionally Calendars.Read.Shared if you intend to embed a shared calendar).
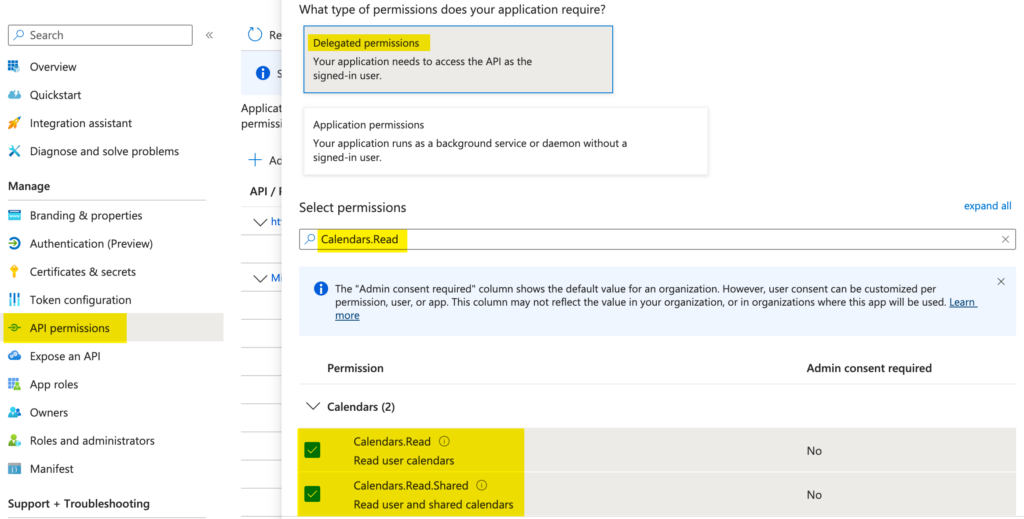
- Click Add permissions.
- Finally grant admin consent.
- To be able to use these permissions, you must log out from WordPress.
- Log in to WordPress with your Microsoft Entra ID work or school account.
Configure the app to embed a calendar
- Return to the plugin’s M*365 Apps page.
- Click the pencil icon for the new Calendar embed-app to edit the configuration.
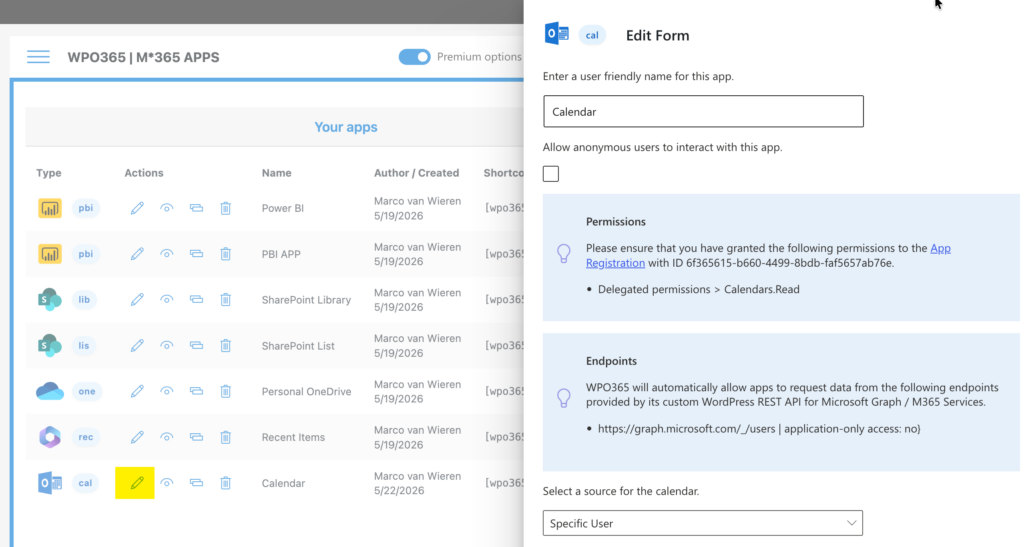
- Optionally you can change the app’s friendly name, as it appears in the M*365 Apps list.
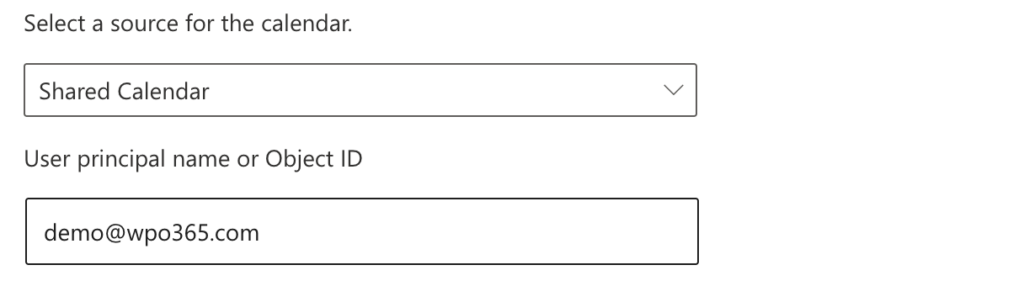
- Select a source for the calendar. Choose between:
- Logged-in User Displays events from the logged-in users’s own calendar.
- Shared Calendar Lists items from a specific calendar. The calendar must be shared with the logged-in user.
- Specific User Shows events from the default calendar of a specific user. The logged-in user must have been granted delegated permissions to view the calendar.
- Specific Group Event from the default calendar from a Microsoft 365 group will be listed. The logged-in user must be a member of the group.
- Depending on the selected source of the embedded calendar, you are asked to identify the calendar either by entering a Microsoft Entra ID username (formatted as an email address) or a group ID (formatted as GUID).
- Define how events are grouped. Choices are:
- By day
- By week
- By month
- By year
- And finally configure the calendar range. Choices are:
- Today
- This week
- This month
- This year
- Custom
- When you specify a custom calendar range, you have several “rolling” options:
- Starting on the current day, show events for the upcoming year.
- A fixed start date.
- A fixed end date.
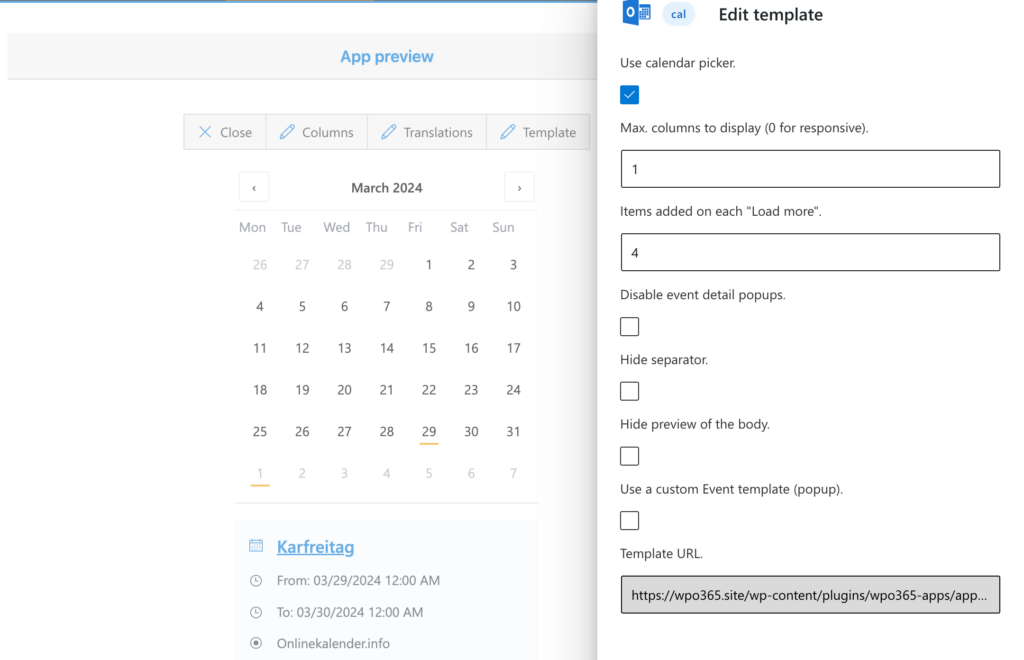
Preview the embedded calendar and customize the look and feel
- Click the preview icon to view the embedded calendar.

- Select Template to customize the look and feel of the embedded calendar.

- To allow users to navigate the calendar, check the option Use calendar picker.
- When the calendar picker is enabled, the events will be displayed on cards instead.
- You can configure how these cards should flow and wrap responsively, depending on screenwidth.