Perform the following steps to prepare your WordPress website to integrate with the Entra User Provisioning service.
- Go to WP Admin > WPO365 > User sync.
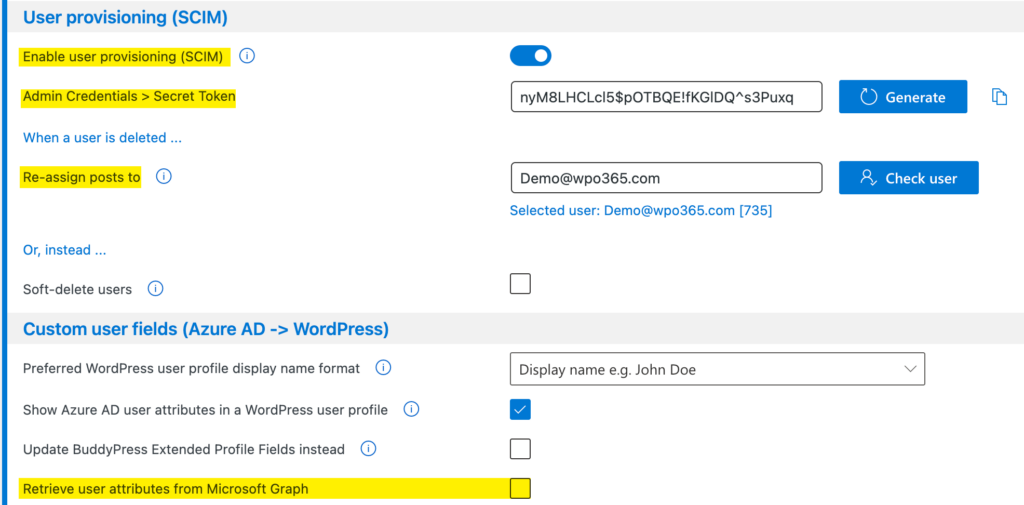
- Toggle Enable user provisioning (SCIM) to ensure that WPO365 is ready to connect with Entra ID.
- To create a new Secret Token, click the Generate button. The token is required for the next step of configuring the Admin Credentials in Entra ID. Please note that you can also enter your own token. The method of adding a token to the system through the globally defined constant WPO_SCIM_TOKEN in your wp-config.php has been deprecated.
- Decide what should happen if a user is deleted in Entra ID (AAD).

Please note By default, when a user is deleted in Entra ID, the user is initially soft-deleted. A user will be permanently deleted from Entra ID (AAD) only after 30 days. When you connect WordPress via SCIM with Entra ID (AAD), this means that a user is first deactivated* in WordPress before they are permanently deleted. When a user is deleted from WordPress, you have the option to reassign any posts they have created to another user. To configure, input a user’s username into the text field and click the Check User button. When a user is successfully identified, their username and user ID are displayed in blue text beneath the text field. Alternatively, you may opt for soft-deleting users, which means that the user is deactivated*.
It should be noted that if Entra ID (AAD) provisions a soft-deleted user again, their WordPress account will be reactivated.
* Deactivated The user will be retained within WordPress forever, but their roles will be removed. WPO365 will also prevent any attempts by the user to sign in using local WordPress credentials.
- Scroll down and uncheck the option Retrieve user attributes from Microsoft Graph. This will stop WPO365 from requesting user attributes from Microsoft Graph every time a user signs in with Microsoft on your WordPress website.
- Continue to scroll to the bottom and click Save configuration.
Please note Because you are receiving your user identities from Entra ID, there is no need for WPO365 to attempt to update user details each time a user signs in on your WordPress website. Therefore you can speed up the user-authentication by checking the Express login option on the plugin’s “Login / Logout” configuration page.
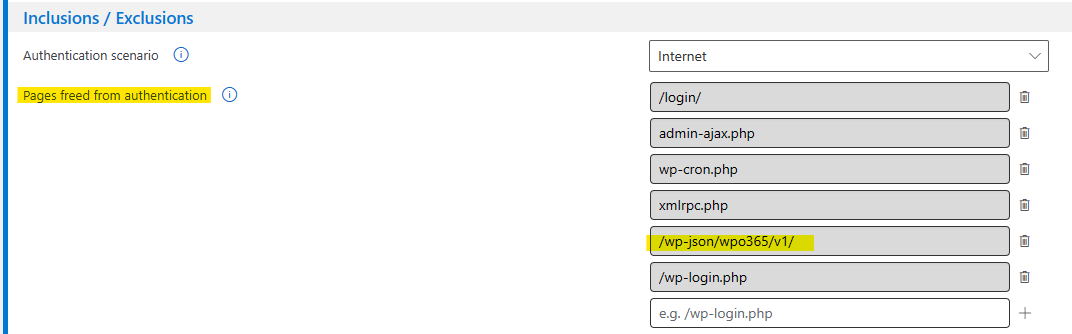
You will need to ensure that Entra ID is able to access your WordPress REST API or else it cannot push SCIM compliant messages to the custom SCIM endpoint provided by the plugin.
- Please make sure that you disable any plugins that may block access to the WordPress REST API and double check your firewall configuration.
- Navigate to WP Admin > WPO365 > Single Sign-on and add /wp-json/wpo365/v1 to the list of Pages freed from authentication. Make sure to click + to add the new line.
- Scroll to the bottom of the page and click Save configuration.