
Perform the following steps to define how data flow between Entra and eventually your WordPress website.
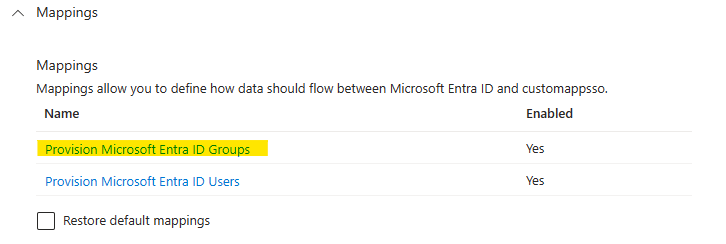
Mappings allow you to define how data should flow between Microsoft Entra ID (AAD) and the Enterprise Application that you have created in the previous step and that represents your WordPress website (referred to as customappsso) in Entra ID (AAD).
Mappings exist for Users and for Groups. Since WPO365 does currently not support the provisioning of Groups, you must disable this group of mappings.
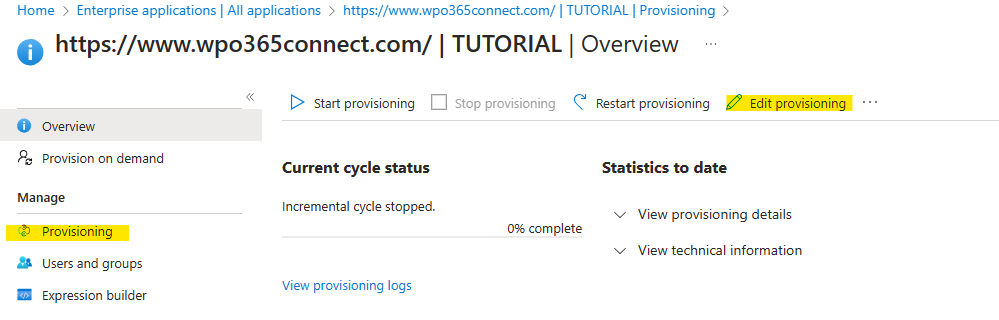
- From the Enterprise Application Overview page, either click Edit provisioning or Provisioning.
- Click to expand the Mappings section and click Provision Microsoft Entra ID Groups.
- Continue and toggle No for the Enabled setting.
- Click Save and return to the Provisioning page.

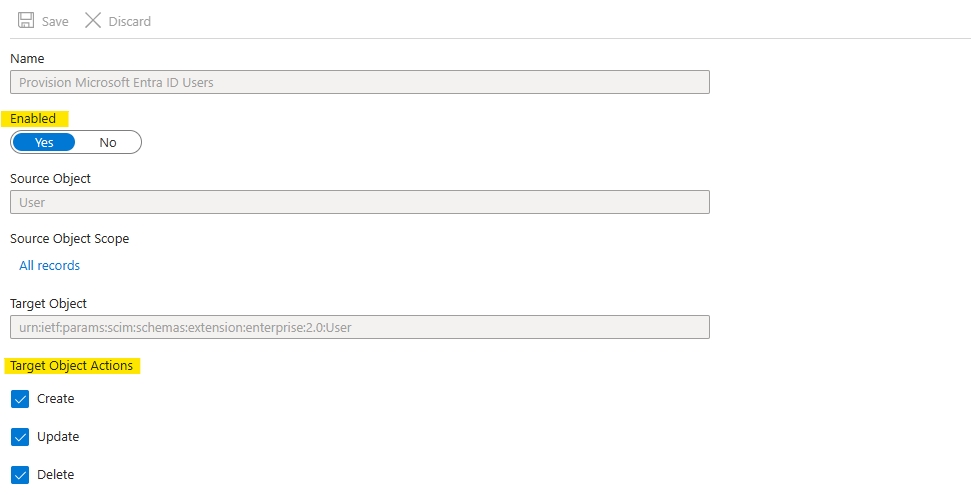
- To edit the Attribute Mappings for Entra ID Users, click the Provision Microsoft ID Users link.
- Ensure that Enabled is Yes and review the Target Object Actions and adjust them as necessary.
- Examine the list with Attribute Mappings and ensure that the following mappings exist; Otherwise, WPO365 will not work as expected.
| customappsso Attribute | Microsoft Entra ID Attribute |
| userName | userPrincipalName |
| active | Switch([IsSoftDeleted], , “False”, “True”, “True”, “False”) |
| emails[type eq “work”].value | |
| name.givenName | givenName |
| name.familyName | surname |
| name.formatted | Join(” “, [givenName], [surname]) |
WPO365 works best, if it also receives the user’s Entra ID (AAD) Object ID. However, this attribute is not mapped by default. Perform the following steps to add a custom mapping.
Add a custom mapping for objectId
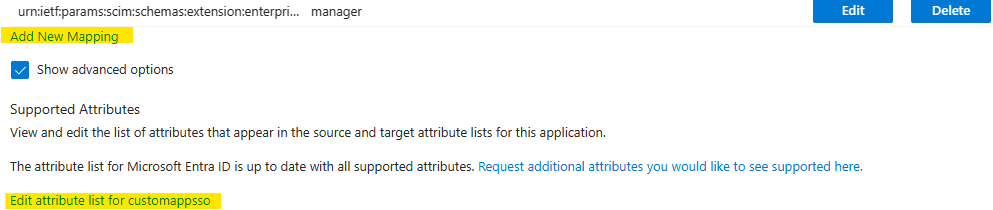
- Scroll to the bottom of the list with the Attribute Mappings and check the option Show advanced options.
- Click the link to Edit attribute list for customappsso to add a new attribute.
- On the Edit Attribute List screen, scroll to the bottom of the list and add a new attribute with the name urn:ietf:params:scim:schemas:extension:wpo365:2.0:User:objectId and leave type as string, as depicted below.

- Scroll back to the top of the list and click Save.
- The Edit Attribute List screen will close automatically and you are back at the Provisioning page.
- Click Add New Mapping (see previous screenshot).
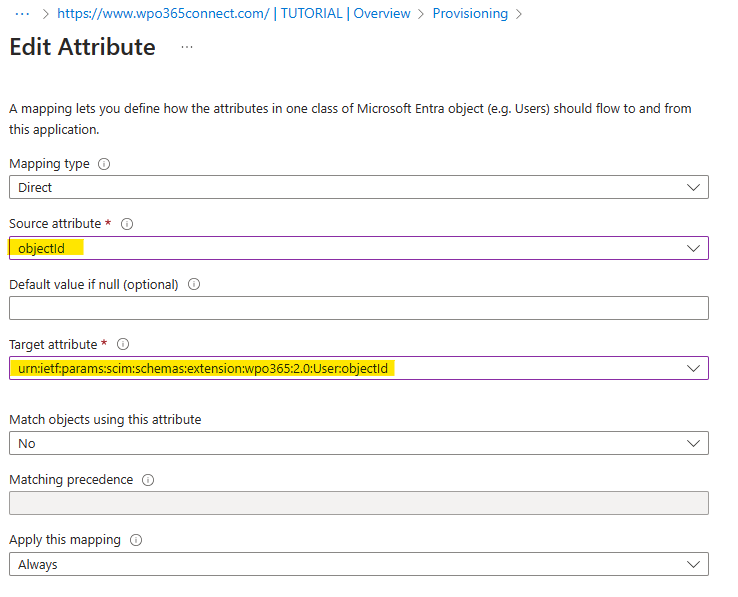
- On the Edit Attribute screen, create a new mapping with the following details:
| Option | Value |
| Mapping type | Direct (default) |
| Source attribute | Select objectId from the list |
| Default value if null | Empty (default) |
| Target attribute | Select urn:ietf:params:scim:schemas:extension:wpo365:2.0:User:objectId from the list |
| Match objects using this attribute | No (default) |
| Matching precedence | Empty (default) |
| Always apply this mapping | Always (default) |
- Scroll to the bottom of the page and click Ok to save the new mapping.
- The Edit Attribute screen will close automatically and you are back at the Provisioning page.
WPO365 now captures the user’s objectId and internally stores it as user metadata under the key name aadObjectId and uses it to search for the user when they sign in with Microsoft.