
Perform the following steps to define a new rule to dynamically assign a WordPress role to a user, based on that user’s Azure AD group memberships.

Please note Before you can perform the steps below to create a mapping, you must select a WP role(s) update scenario e.g. Add or Replace on the plugin’s User Registration configuration page.

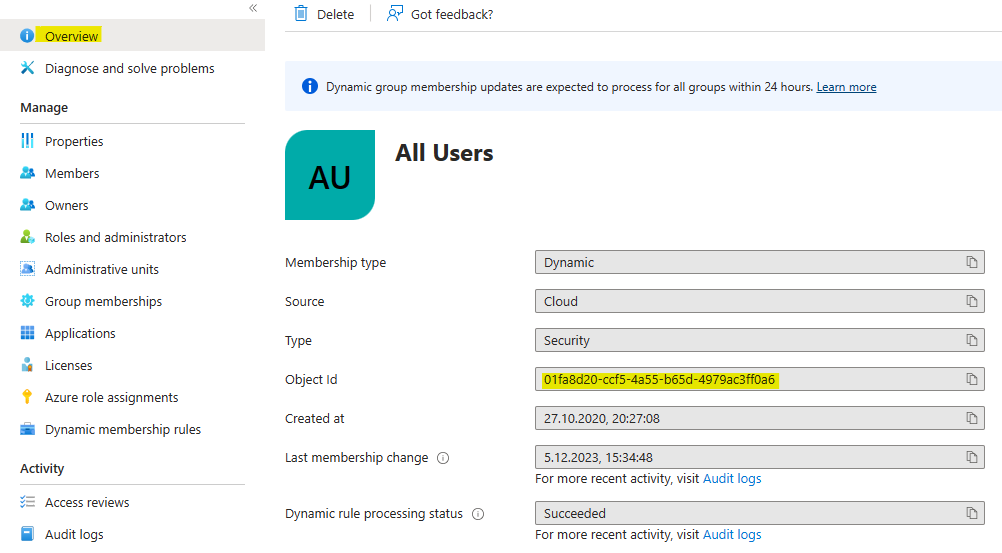
- Open (in a new browser tab) Microsoft Entra ID and expand the Identity menu.
- Navigate to Groups > All groups.
- Select the group you want to create a new rule for and from the Overview page copy the group’s Object ID.
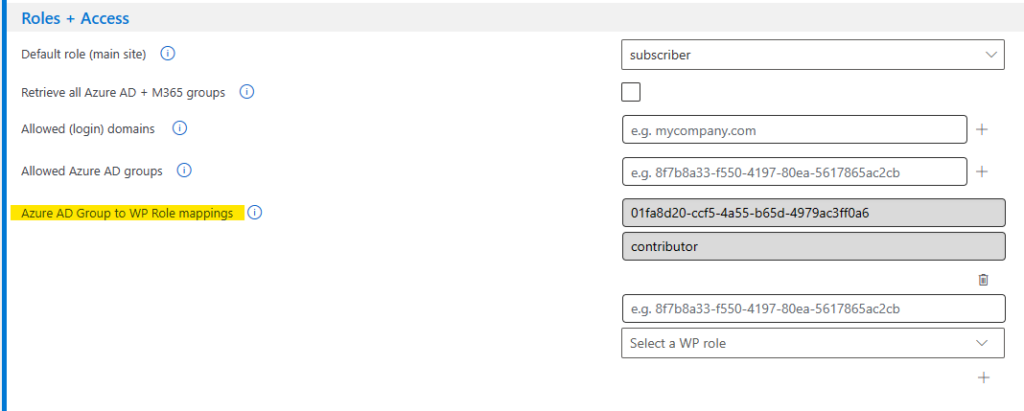
- Navigate to the plugin’s User registration configuration page.
- Scroll down to Azure AD Group to WP Role mappings.
- Paste the Object ID of group on a new line and to left of it select the WordPress role that the group should map to.
- Click + to add the mapping.
- Click Save configuration.
Please note It is recommended to first choose your update scenario before you test your updated WPO365 configuration.