
Perform the following steps to install a premium addon.
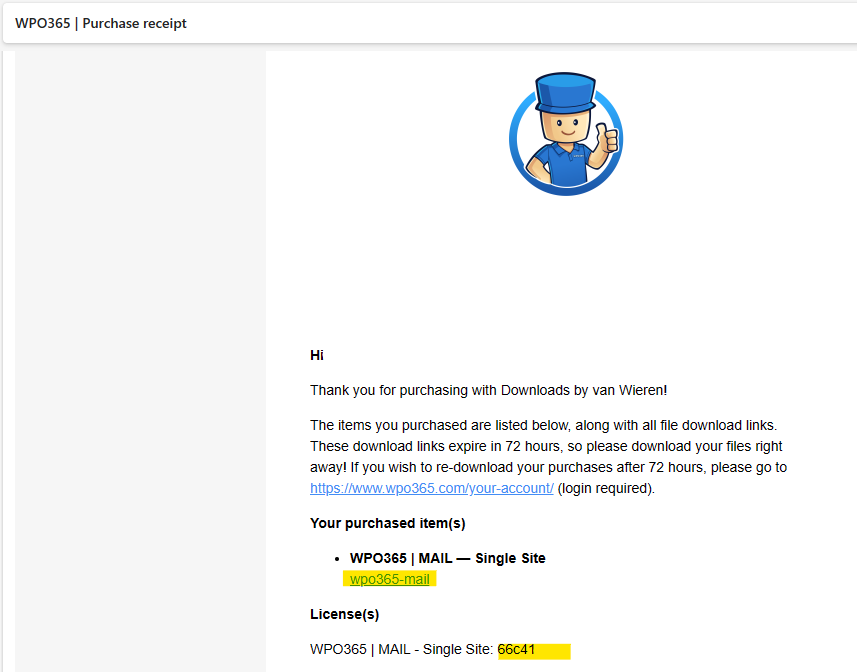
- Start by downloading the premium addon using the download link that you will find in the email with subject WPO365 | Purchase receipt that we sent immediately after you completed the purchase.

Please note The download link provided in the purchase receipt email is only valid for 72 hours. After that it expires and it cannot be used anymore. If the download link is expired, please log into https://www.wpo365.com/your-account/ using the instructions provided in the welcome email. and download the latest version from our website.
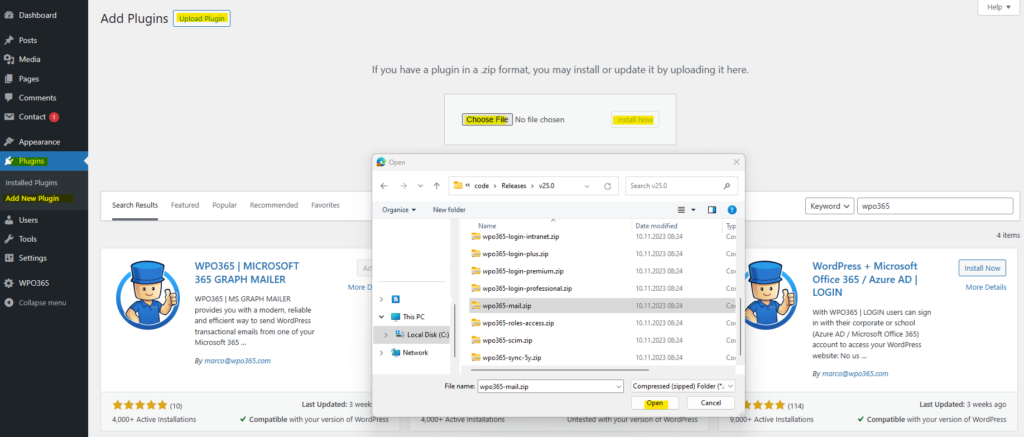
- Navigate to your WordPress website’s backend and continue to Plugins > Add new.
- Click Upload plugin.
- Click Choose file, select the zip-file that you just downloaded, click Open to confirm and finally click Install Now to upload and install the premium plugin.
- Click to Activate Plugin.
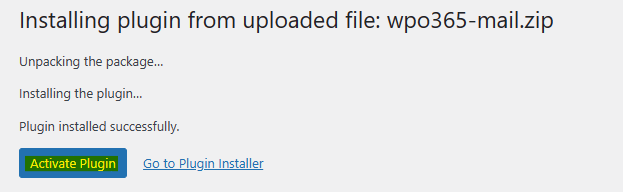
Please note If you are updating an existing plugin and your are uploading a newer version of an existing plugin, then you will be asked whether you want to Replace Plugin in which case you should response with Yes.
- Once the premium plugin has been activated, you will notice a new Licenses submenu under the WPO365 entry in the standard WordPress Admin menu.
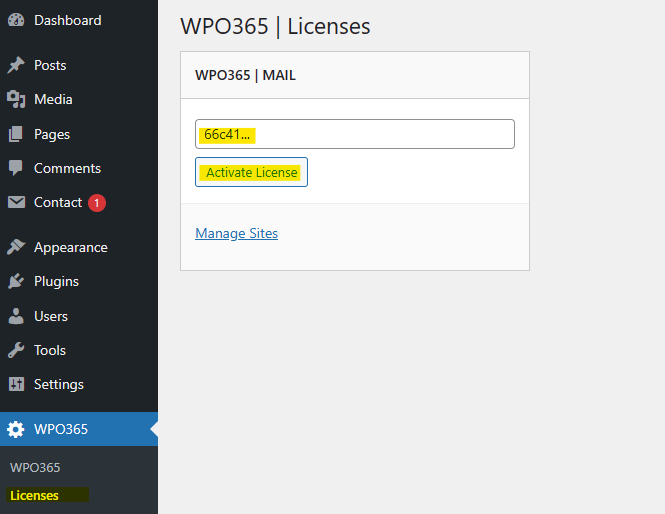
- Enter your personal license key that you will find in the email with subject WPO365 | Purchase receipt that we sent immediately after you completed the purchase and click Activate License.
Please note You will also find your personal license key when you log into https://www.wpo365.com/your-account/ using the instructions provided in the welcome email.