
This guide walks you through the steps to embed Power BI content – such as reports or dashboards – into your WordPress site for users within your own organization.

Before you begin, make sure you are familiar with the prerequisites and understand the difference between the two main embedding scenarios: embedding for your organization and embedding for your customers. This tutorial focuses specifically on the organizational embedding approach, where users sign in with their Microsoft 365 accounts and access content based on their assigned permissions and licenses.
Prepare Microsoft Entra
Perform the following steps, to (create and) update the registered Microsoft Entra application, so that users can sign in with their Microsoft account, and view Power BI content embedded in WordPress.
- Register a Microsoft Entra application – so that users can sign in using Microsoft’s Single Sign-On (based on OpenID Connect) – by following the steps detailed in the following tutorial: https://tutorials.wpo365.com/courses/single-sign-on-openid-connect/.
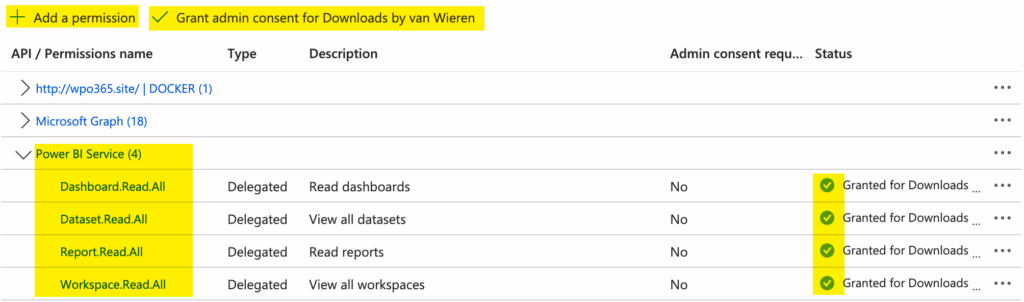
- Configure the following API Permissions for the application that you registered in Microsoft Entra:
- Power BI Service > Delegated > Dashboard.Read.All
- Power BI Service > Delegated > Dataset.Read.All
- Power BI Service > Delegated > Report.Read.All
- Power BI Service > Delegated > Workspace.Read.All
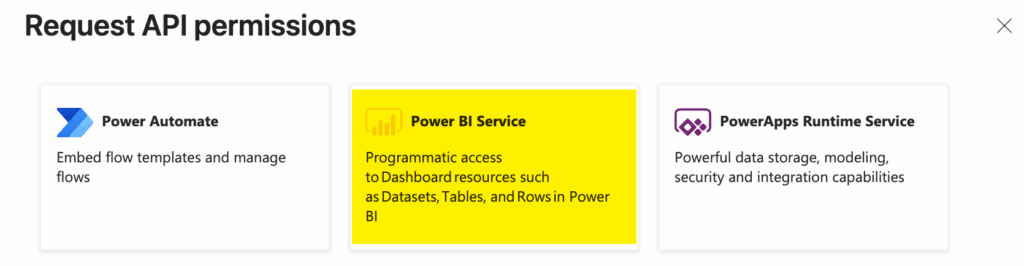
- To add these permissions, go to https://entra.microsoft.com/ – sign in – and continue to Entra ID > App Registrations. Find your App Registration and continue to its API Permissions page. In the section Configured permissions click the + Add a permission button. Locate the Power BI Service card, as shown below and add the aforementioned permissions.
- Once you have finished adding the necessary permissions, click Grant admin consent for [your organization]. After that, the permissions list should look similar to the screenshot shown earlier under Configured permissions.
Prepare your Power BI service
Perform the following steps to ensure that your Power BI service can serve embedded content to users in your organization.
- Ensure all users who will view embedded content have a Power BI Pro or Premium Per User (PPU) license and have access to the Power BI workspace and report.
Prepare WPO365 Integration settings
The following steps are needed to prepare your WPO365 powered WordPress website, so that client-side JavaScript apps can send requests on behalf of the signed-in user to Microsoft Graph, as well as the Power BI and Fabric REST API endpoints.
- Navigate to WP Admin > WPO365 > Integration and scroll down to the section Microsoft 365 Apps.
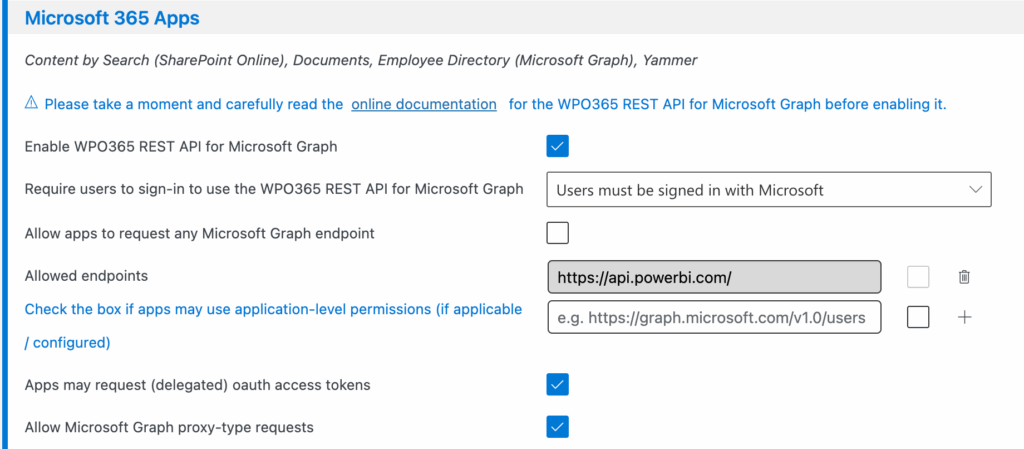
- First check the box to Enable WPO365 REST API for Microsoft Graph.
- Then decide how users should be authenticated when using the API – whether they must sign in with Microsoft, use a local WordPress account, or access it without signing in. The recommended option is User must be signed in with Microsoft, because WPO365 cannot grant access to embedded Power BI content for users who haven’t signed in with their Microsoft account.
- Next, choose which Microsoft Graph endpoints the API should allow users to access. While it’s technically possible to allow access to all endpoints, it’s strongly recommended to explicitly allow-list only the ones you need. To enable users signed in with Microsoft (via SSO) to access embedded Power BI content, make sure to include https://api.powerbi.com/ in the list.
- Finally, ensure that you checked the last two options so that Apps may request (delegated) oauth access tokens and to Allow Microsoft Graph proxy-type requests.
- Make sure – after you applied all the changes – to scroll down and save your changes.
Generate an embed shortcode
Perform the following steps to generate an embed shortcode.
- Go to WP Admin > WPO365 > … > Power BI Embed as shown below.
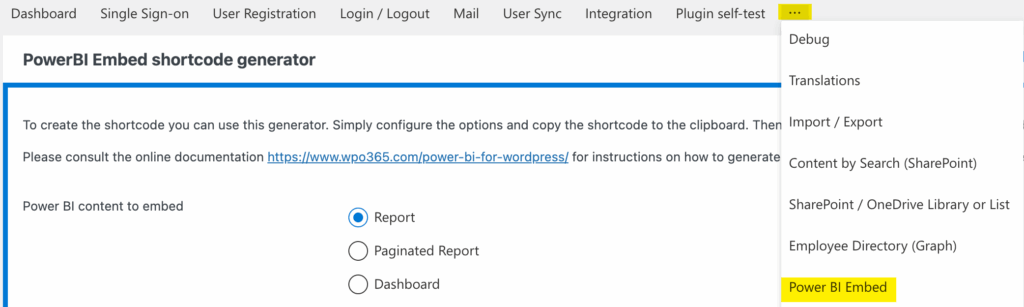
- Enter the necessary parameter – depending on the type of content that you want to embed e.g. a report, dashboard or tile, as shown in the screenshot below.

- The following parameter are mandatory to fill out.
- Embed token type Microsoft Entra Application (SSO) to embed for your organization.
- Workspace / Group ID The ID of the workspace where the Power BI content lives.
- Report ID The ID of the report that you want to embed. Please note that this will change to – for example – Dashboard ID, based on the selected Power BI content to embed.
- Dataset ID The ID of the dataset in case your data is not embedded in the report but in a separate dataset.

- To locate the Workspace (or Group) ID and the Report ID, open the report in the Power BI service and check the URL — the IDs will be displayed there, as shown in the screenshot above.
- Similarly, to find the Dataset ID, open it in the Power BI service and copy the ID.
- Define the width and height of the element that will contain the iframe to embed the Power BI content. Note that you should enter here a value and a CSS compliant measure e.g. “px” for pixel or “vh” for a percentage of the client height (and “vw” for a percentage of the client width).
- Finally, copy the the shortcode to the clipboard, create a new page and paste the shortcode.