
Video Walkthrough
Please follow along with the video walkthrough below, demonstrating the necessary steps to embed Power BI for your customers in WordPress.

Before you begin, make sure you are familiar with the prerequisites and understand the difference between the two main embedding scenarios: embedding for your organization and embedding for your customers. This tutorial focusses on embedding Power BI content for your customers. Please note that this is a premium feature and requires the WPO365 | M365 APPS or WPO365 | INTEGRATE plugin.
To embed Power BI content for your customers, you’ll need also to install the free WPO365 | LOGIN plugin. This plugin offers essential Microsoft 365 integration features, including Single Sign-On (SSO). If you only want to embed Power BI content for your customers and don’t require users to sign in via Microsoft accounts, you can simply disable SSO in the plugin’s Single Sign-on settings.
Registering your website in Microsoft Entra ID
Follow these steps to register a Microsoft Entra application, which you’ll later configure as a service principal with access to the Power BI service and its workspaces assigned to Premium capacity. This setup allows users who don’t have a Power BI Pro license to view embedded Power BI content hosted in those workspaces.
If you have already registered an application in Entra ID – for example, to enable users to sign in with Microsoft using OpenID Connect-based Single Sign-On – there is no need to create a new one. You can simply reuse that existing application and its configuration parameters. You do not need to apply any changes to it. However, if you previously added the following delegated Power BI Permissions:
- Dataset.Read.All
- Report.Read.All
- Workspace.Read.All
- Dashboard.Read.All
then you can now remove those permissions, as they are not needed when embedding Power BI content for customers using application permissions. After you removed the permissions, make sure to Grant Admin consent again for the updated permission set.
If you didn’t register an application in Entra ID yet, then please perform the following steps:
- Open a new browser tab and sign in to the Microsoft Entra portal.
- Navigate to Entra ID → App registrations.
- Click New registration to register a new application.
- Enter a name for the application (for example, the name of your WordPress site).
- Under Supported account types, select:
- Accounts in this organizational directory only (Single tenant).
- You do not need to configure the Redirect URI.
- Click Register to create the application.
Copying required IDs to the WPO365 plugin configuration
- After registration, remain on the registered application’s Overview page.
- Copy the Directory (Tenant) ID.
- Navigate to the plugin’s Integration configuration page.
- In the section Application access section click to Enable application access.
- Paste the copied Directory Tenant ID field in the corresponding field.
- Switch back to registered application’s Overview page and this time copy the Application (Client) ID.
- Paste it into the corresponding Application Client ID field on the plugin’s Integration configuration page.
- Switch back to the registered application’s Certificates & secrets page to create an application (client) secret for the new application (see https://tutorials.wpo365.com/courses/single-sign-on-openid-connect/lessons/create-an-application-client-secret/) and make sure to copy the value of the secret.
- Paste it into the corresponding Application Client Secret field on the plugin’s Integration configuration page.
- Scroll to the end of the page and click to Save configuration.
Prepare your Power BI service
Perform the following steps to enable prepare your Power BI service and allows service principals with the appropriate roles and item permissions to call the Power BI / Fabric service API.
- Go to https://app.powerbi.com/ and sign in as administrator.
- Click the Gear icon in the upper corner to open the Settings menu, scroll to the Governance and administration section and click Admin portal.
- Locate the Developer section in the Tenant Settings section.
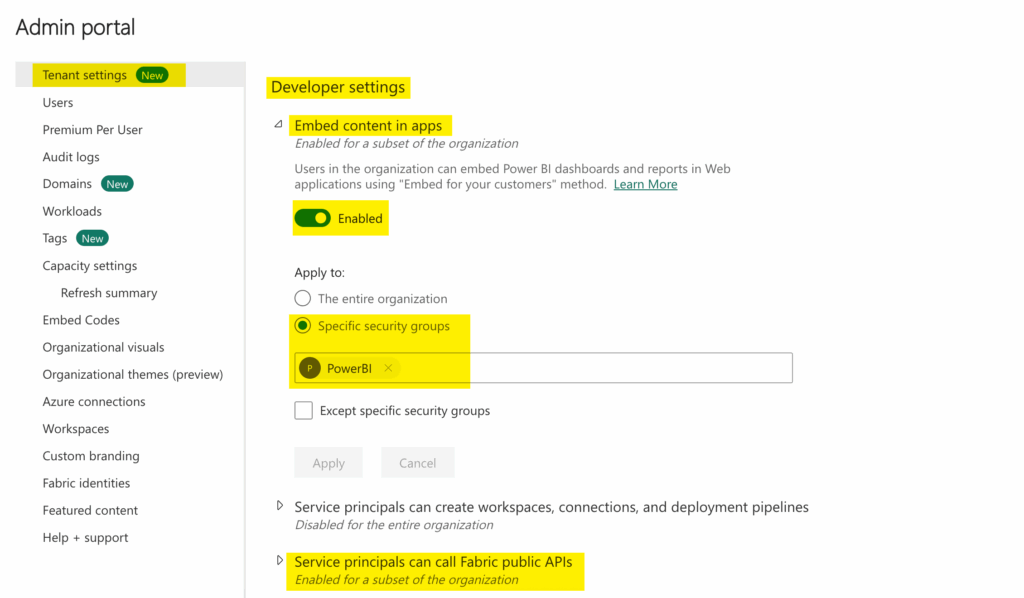
- Expand Embed content in apps and enable it.
- Next you can select whether the setting applies to the entire organization or specific security groups.
To limit a setting to specific service principals, start by creating a security group in Entra ID and add the registered applications or service principals as members. Then, select that group as shown in the screenshot above, and click Apply to confirm your selection.
- Repeat the last two steps for the setting Service principals can call Fabric public APIs.
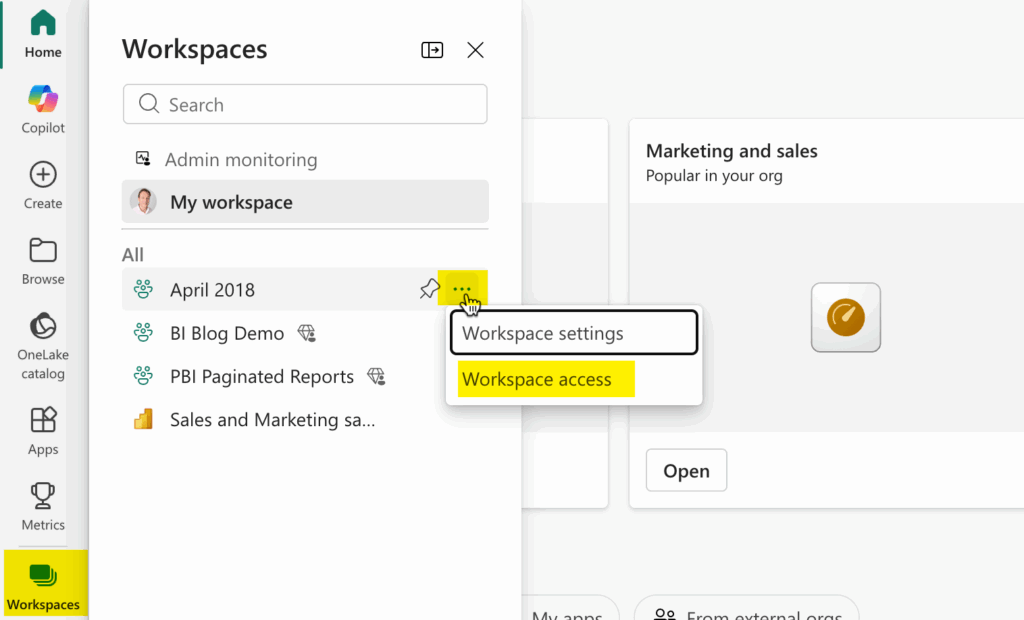
- Continue to the workspace where the content and data that you wish to embed for your customers lives, and update the access as shown below.
- Add the service principal as admin, as shown below.
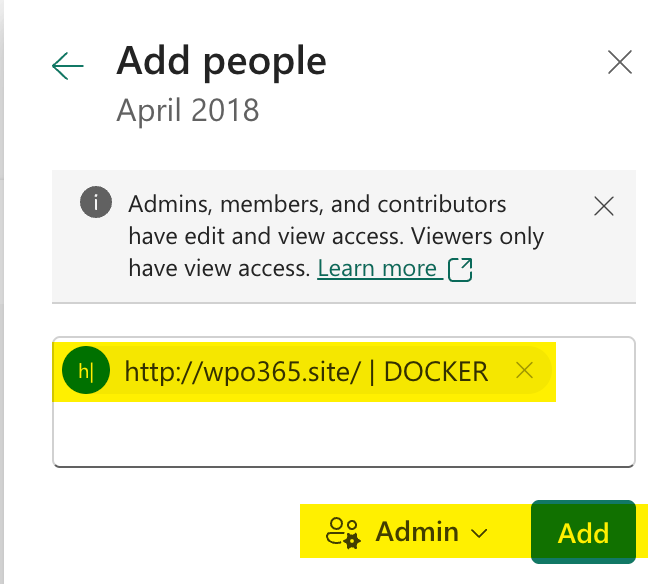
To grant a service principal access to a workspace, you need to enter its full display name. Power BI won’t be able to locate it if you search by its ID or other identifiers.
Review Plugin Installation
- Confirm that both the WPO365 | LOGIN and the WPO365 | M365 APPS plugin are activated and run side by side on the same WordPress site.
Enable Microsoft 365 Apps Support
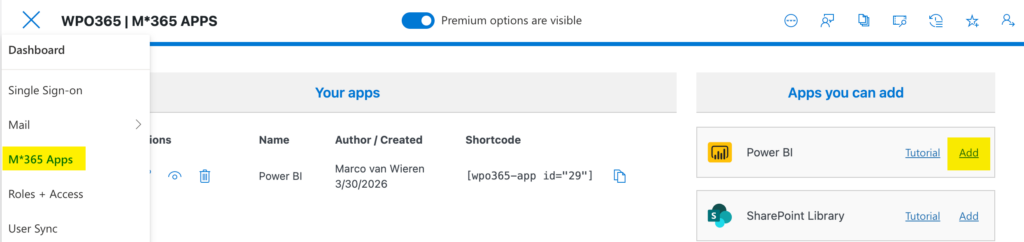
- Navigate to WP Admin > WPO365 > M*365 Apps configuration page.
- When visit the page for the first time, you may be asked to Enable WPO365 for apps to allow client-side JavaScript applications (such as WPO365’s Power BI embed-app) to embed Microsoft 365 content.
Add a Power BI App
- From the list of Apps you can add select Power BI and click Add.
- The configuration screen opens automatically.
The plugin will immediately validate prerequisites and permissions for a default configuration and may report an error. This is expected and should be ignored for customer embedding. Re-open the app’s configuration screen and continue.
Configure the App for Customer Embedding
- Set Embed scenario to Embed for customers. This removes the delegated-permissions warning.
- Optionally change the Friendly name e.g. “Sales Report”.
- Leave Content type set to Report.
- Read the information about permissions and endpoints / proxy.
Collect Power BI IDs
- Open app.powerbi.com in a new tab.
- Navigate to the workspace containing the report.
Workspace (Group) ID
- Open the workspace.
- Copy the group ID from the URL.
- Paste it into the Workspace ID field.
Report ID
- Go to Reports in the workspace.
- Copy the report ID.
- Paste it into the Report ID field.
Dataset ID
- Return to the workspace view and now open the dataset.
- Copy the dataset ID.
- Paste it into the Dataset ID field.

Review Premium Configuration Options
- Notice that manual embed configuration editing is now enabled. It allows you to:
- Manually apply changes to the embed-configuration JSON.
- Update the token request endpoint.
- Adjust token request payload – for example to add an “identities” property to allow for Row Level Security.
- Additional options include:
- Filter configuration.
- Advanced embedding controls.
- Documentation available at https://tutorials.wpo365.com/
Preview the Embedded Content
- Close the configuration panel.
- Click Preview.
- Confirm:
- The Power BI logo appears.
- The report loads successfully.
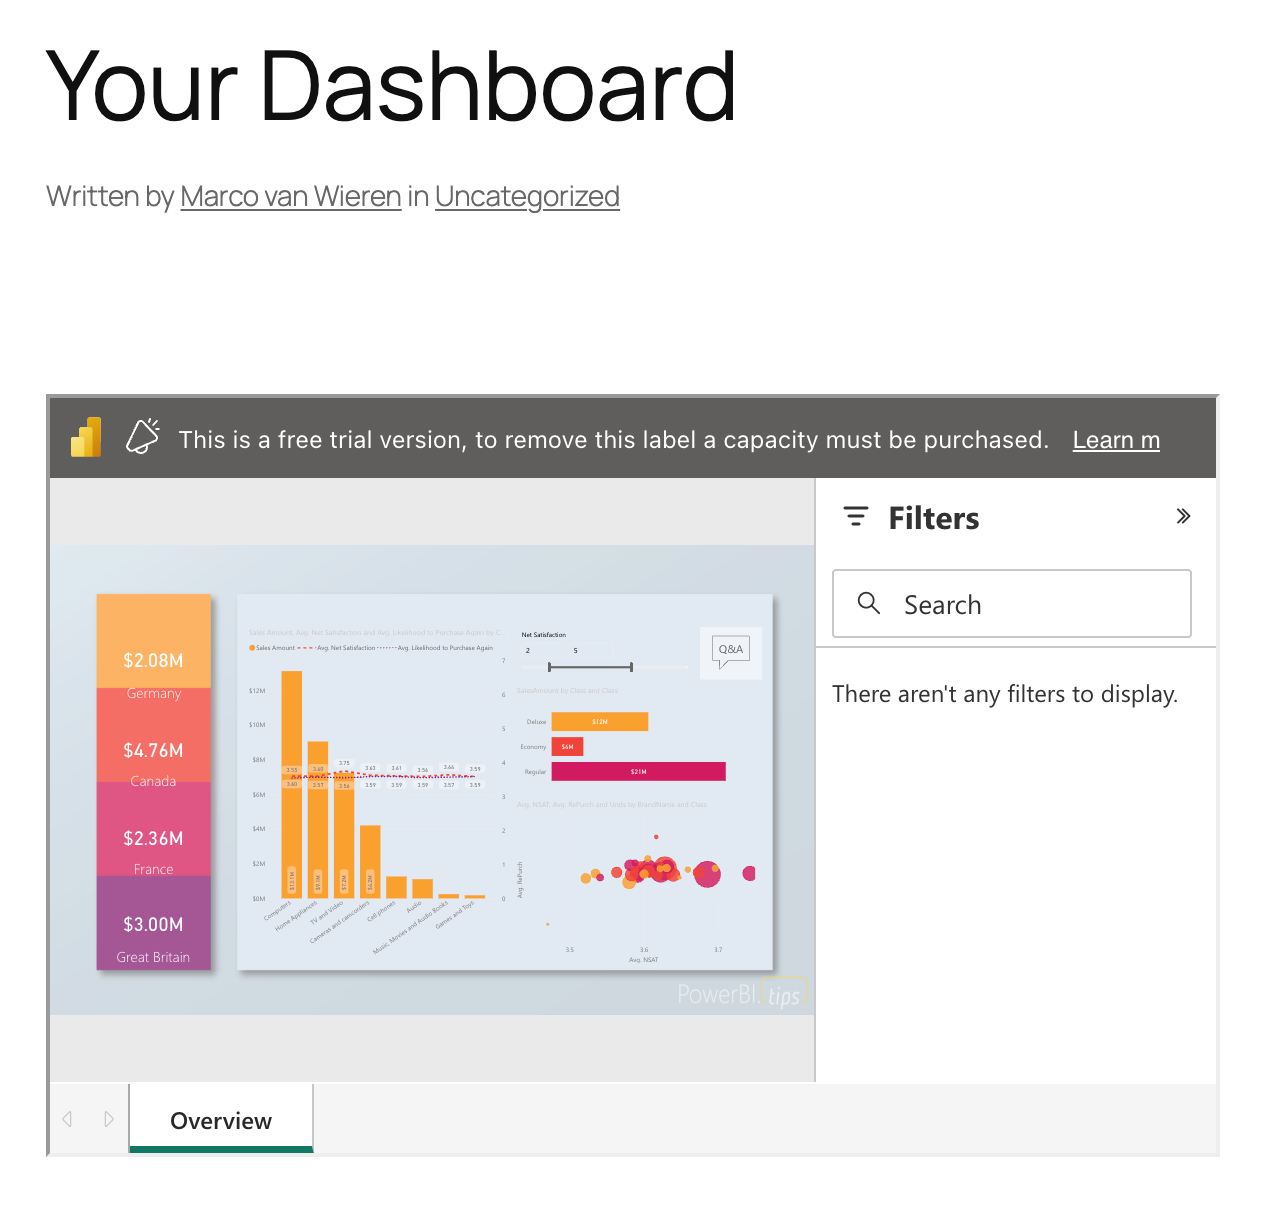
At this point you may see a Microsoft banner stating: “Free trial – add capacity to remove this label”. This means that you are embedding for customers and that the workspace does not have Power BI Premium capacity assigned. For demo purposes you can safely ignore this banner. However, for production it can’t and you need to assign premium capacity to remove the banner.