Introduction
WPO365 Audiences can be used to restrict access to view content to users that are a member of one or more Entra / AAD groups. To make things easier, WPO365 has therefore introduced Audiences: A virtual group of users that is dynamically populated with members of one or more Azure AD groups.
Let’s assume that you have Entra Groups for managers per department e.g. Managers HR, Managers IT and Managers Communications. Let’s also assume that you have a WordPress page titled “Employee Promotion Policy” and you want to make this information exclusively available to managers across all departments in your company. To achieve that, you can create an Audience for Managers and configure this Audience to include all members of the Entra Groups for Managers HR, Managers IT and Managers Communications.

Please note that WPO365 can only assign users to Audiences when you have ensured that it receives (by means of a groups claim in the ID token or in the SAML response) or is able to retrieve (by means of a request to Microsoft Graph) a list of all the Entra Groups that a user is a member of. Refer to the previous topic in this tutorial for guidance.
Configuration
Please perform the following steps to create, update or delete WPO365 Audiences.
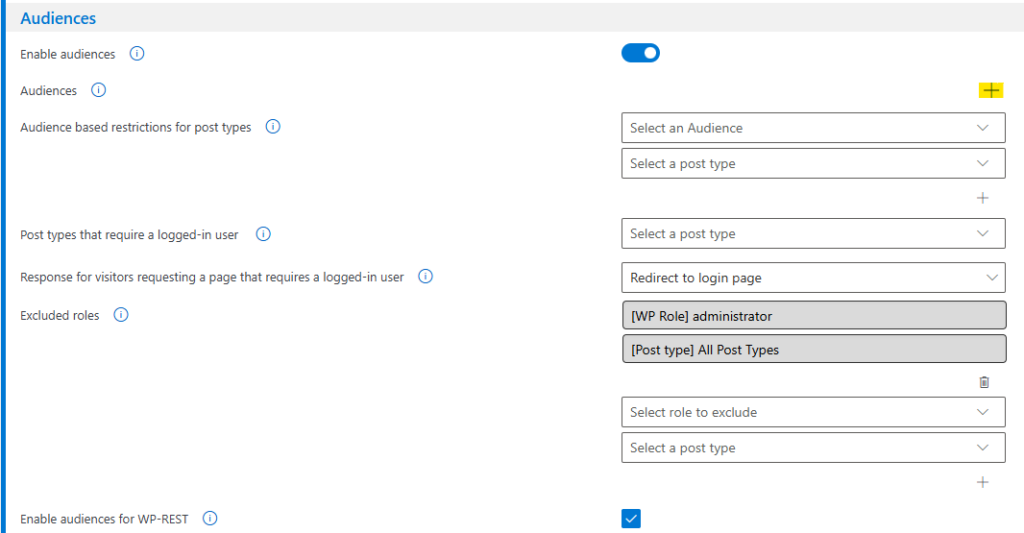
- Go to WP Admin > WPO365 > User Registration and scroll to the Audiences section.
- Ensure that WPO365 Audiences are enabled.
- Optionally also check the option to Enable audiences for the WordPress REST API.
- Continue to the Excluded roles setting and select the roles that should not be affected by WPO365 Audiences. You can limit that exclusion to certain post types or alternatively select All Post Types. In the below example, an administrator has been excluded for all post types. Hence an administrator will be able to see all posts and pages.

- Click “+” the create your first WPO365 Audience.
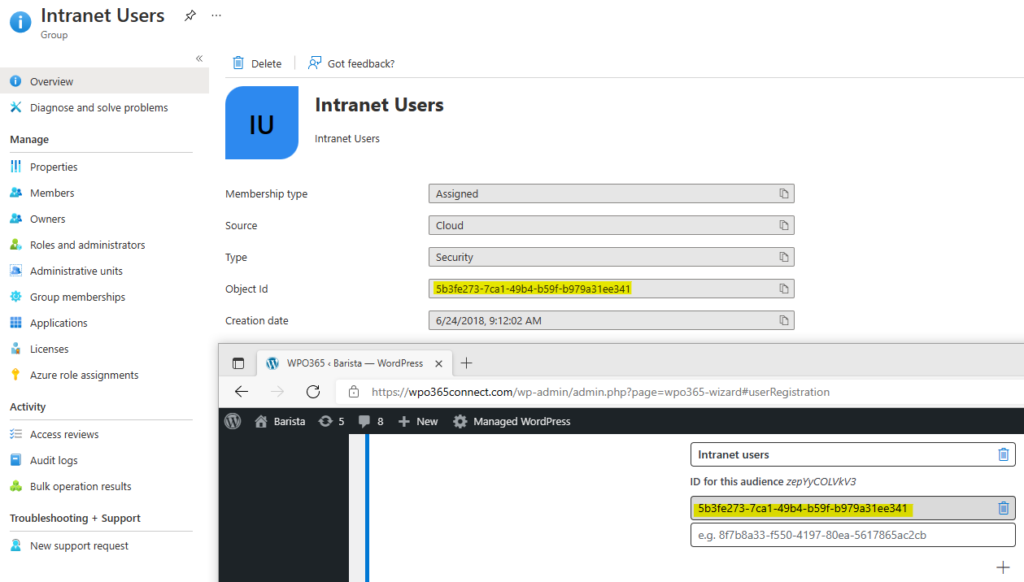
- Enter a name for your WPO365 Audience – for example – Intranet Users. Please note that this name is no related to any of the Entra / AAD Groups that you will be assigning to this WPO365 Audience.
- The ID for your new WPO365 Audience is just for information and does not need to be remembered.

- Now you can add one or more Entra / AAD Group ID(s) to this WPO365 Audience.

- To delete an Entra / AAD Group, simply click the Recycle bin icon.
- To delete an WPO365 Audience, you can click the Recycle bin next to the name field.
- Repeat these steps for all the WPO365 Audiences that you need and once you have finished, scroll to the bottom of the page and click Save configuration.
Test user assignment
Perform the following steps to test whether users are being assigned to the WPO365 Audiences that you have created.
User login
- Go to your site’s login page and click the Sign in with Microsoft button.

- Sign in with a valid Entra / AAD account that belongs to a user that is a member of any of the Entra / AAD groups mapped to any of the WPO365 Audiences that you created.
- Sign out of the site and login again an administrator and continue to WP Admin > WPO365 > Users.
- Look up the user in the list and check the WPO365 Audiences column to see whether the assignment was successful.

User synchronization
- Go to WP Admin > WPO365 > User Sync.
- Click Save + Run now to start your desired WPO365 User Synchronization job.
- After the job completed, look up the user in the list and check the WPO365 Audiences column to see whether the assignment was successful.


